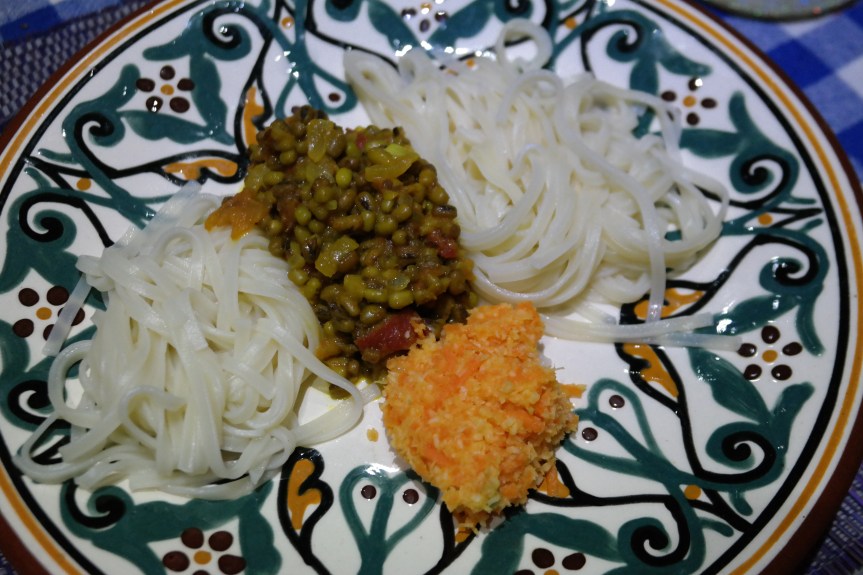
With no end in sight to the COVID-19 pandemic – infections continue to rise steadily here in Kazakhstan, averaging around 1500 new cases a day over the last week – it’s time for some more culinary escapism. We’re transporting our taste buds to Sri Lanka for our take on string hoppers, a super tasty noodle, dhal and chutney combo.
String Hoppers à la Qazaq with mung bean dhal and coconut and carrot sambol
It’s usually served for breakfast on the island, but in our opinion it also works really well as a main meal. Our version features some locally sourced kespe, or noodles, as we couldn’t find red rice noodles in our local supermarket (!) and a dhal made with mung beans – check out KCC’s dhal recipe here (simply replace the red lentils and pumpkin with 200 g mung beans – soak the beans for 3 – 4 hours before cooking).
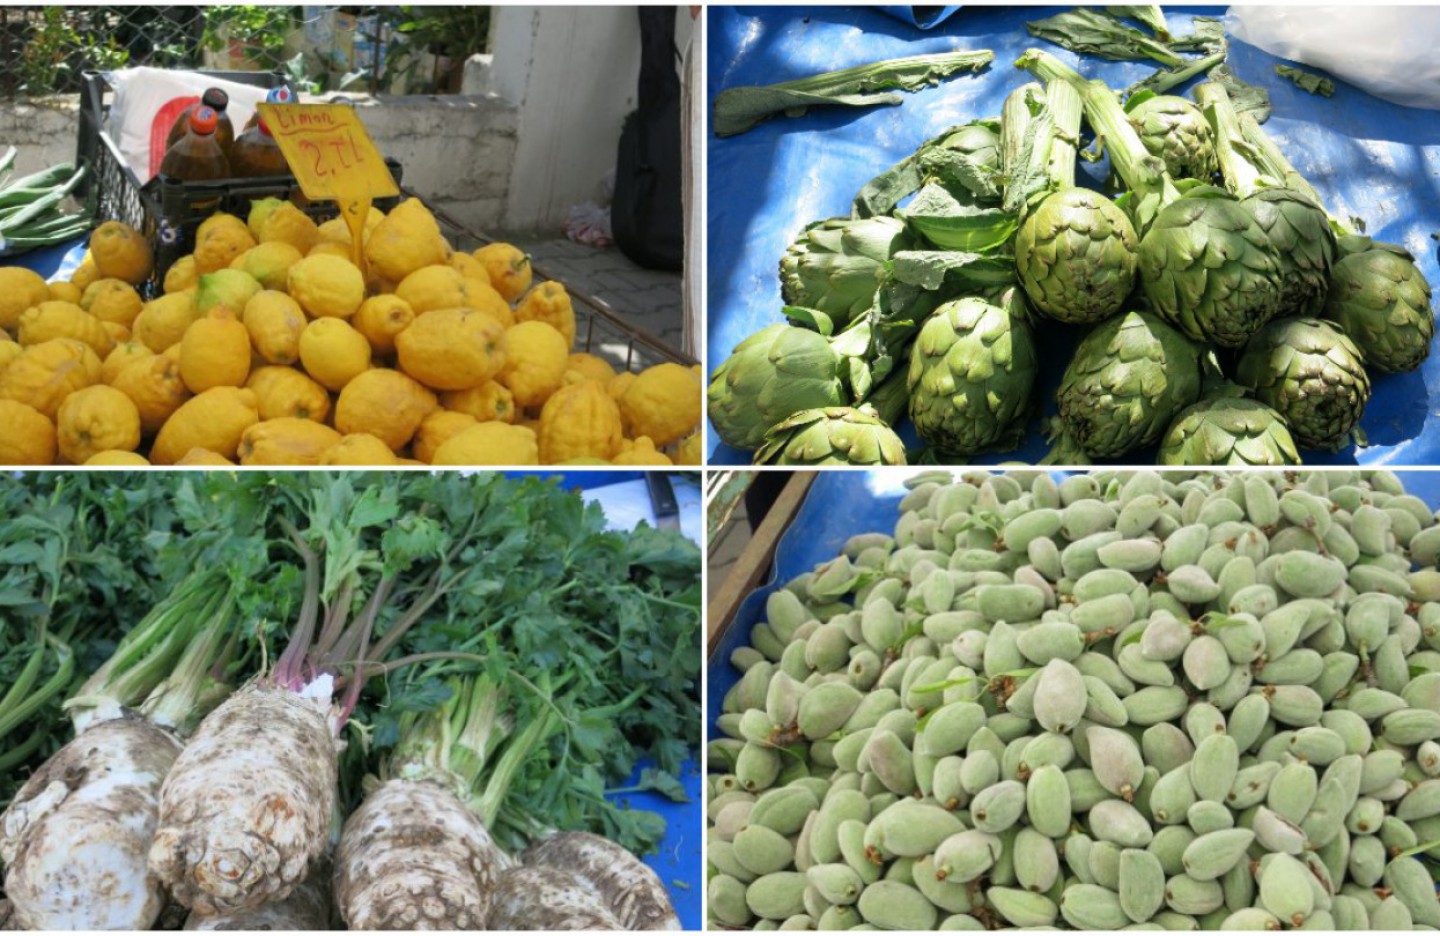
Green hot chilli peppers
Coconut and carrot sambol
Breakfast Sri Lankan style – string hoppers with coconut sambol and dhal in the background
The sambol, a quick and easy chutney, is an essential part of the string hopper experience. It saves on waste, as you can use the dried coconut left over from making the coconut milk for the dhal – click here for our coconut milk recipe.
Kespe – noodles from Kazakhstan
Carrot and Coconut Sambol
Ingredients (serves 3-4)
50 g desiccated (dried) coconut
150 g carrot
One small onion
One small tomato
One fresh green chilli
One lemon
Method
Grate the tomato and mix with the finely chopped onion in a large bowl. Add the dried coconut and the juice of the lemon and then add the grated carrot and combine all the ingredients together. Gradually add the finely chopped green chilli, tasting every now and then until you reach your chilli heat tolerance levels.
Serve alongside the mung bean dhal mentioned above and with noodles or spaghetti — use about 75 g of dried pasta per person, cooked according to the instructions on the pack.
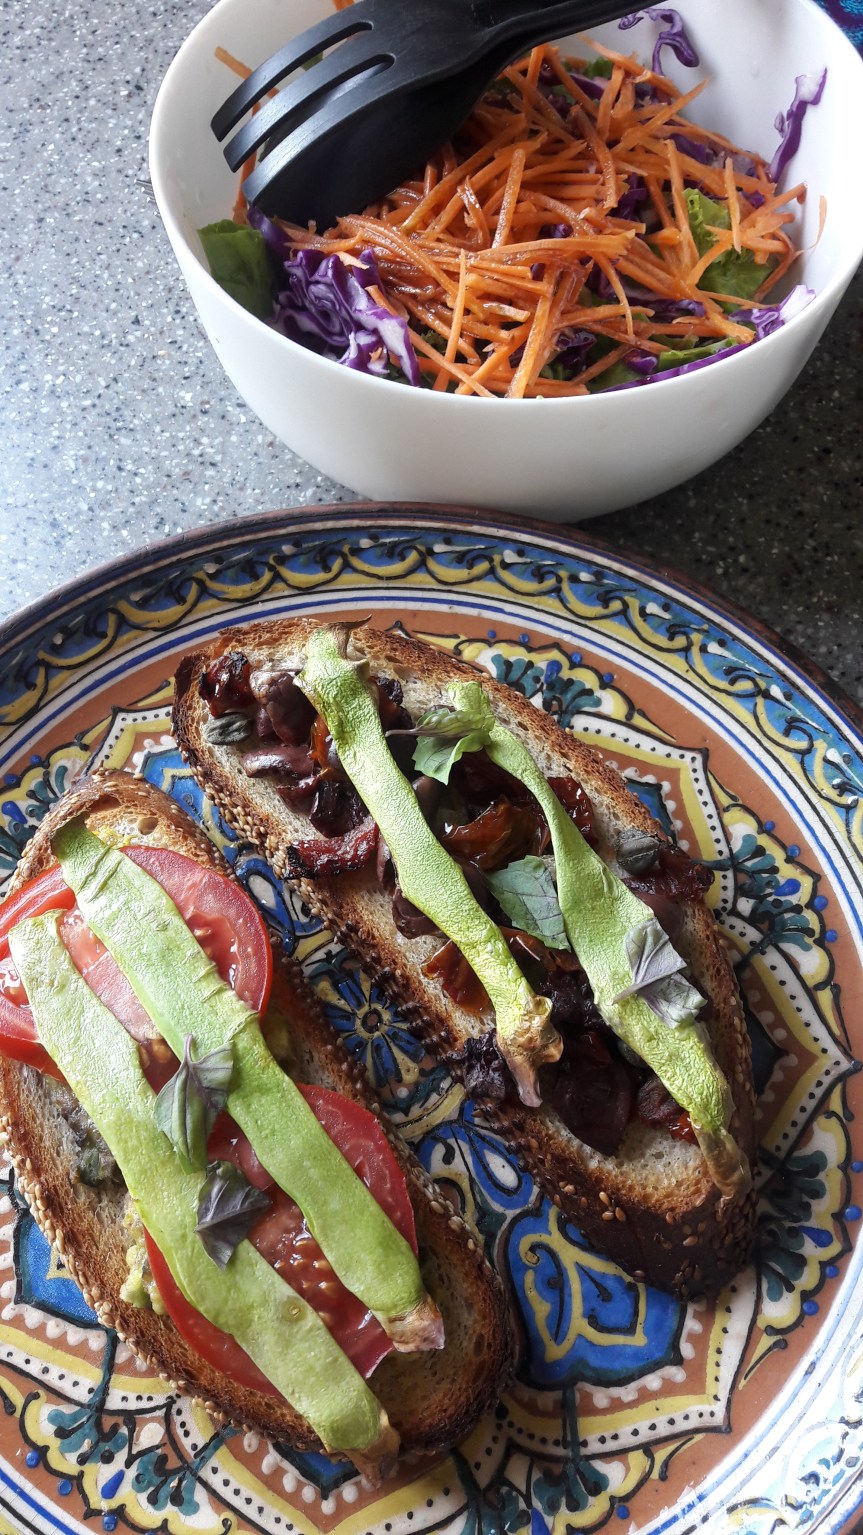
This week were honing in on a favourite Italian starter, bruschetta – slices of toasted bread served with a range of different toppings. We’ve opted for a heartier version using chunky slices of bread that can double up as a main meal when you add a salad of your choice.
In Italy the slices of bread are toasted on abrustolina, a device made from sheet metal with holes on the bottom and a wire rack on the top (see pictures below taken from the Grand Voyage Italy website). This is placed over the heat source on your stove top and can be used to make toast, grill polenta and roast peppers, courgettes or aubergines.
Put the brustolina over the flame
A brustolina in action
Being unable to make it to Italy to pick up a brustolina at this point in time due to the pandemic, we’ve had to make do with our oven to toast the bread. Brush your thickly cut slices with olive oil and a rub of garlic and cover one side with a topping of your choice.
We went for capers, sun-dried tomatoes and black olives with thin slices of courgette and basil leaves for the first option and home-made guacamole, topped once again with thin slices of courgette and basil leaves, for option two. Simply leave in a hot oven (200 c) for ten minutes or so until the bread just begins to burn at the edges. Serve immediately with your favourite salad.
There were signs this week of life slowly beginning to return to some sort of normal. Cafes and terraces are set to open once again in Almaty from next week and the streets are busier. We’re not planning on changing too much at the moment and, in the meantime, we’re content to continue our armchair culinary travels.
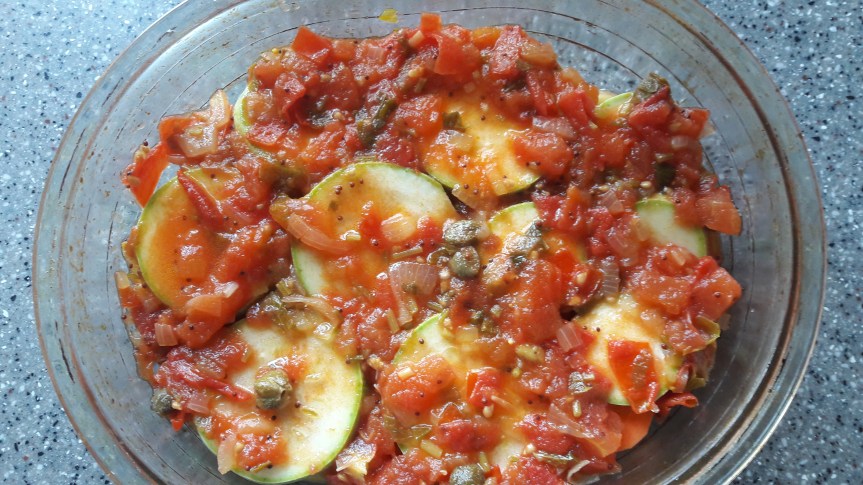
Half-way there – assembling the briam…
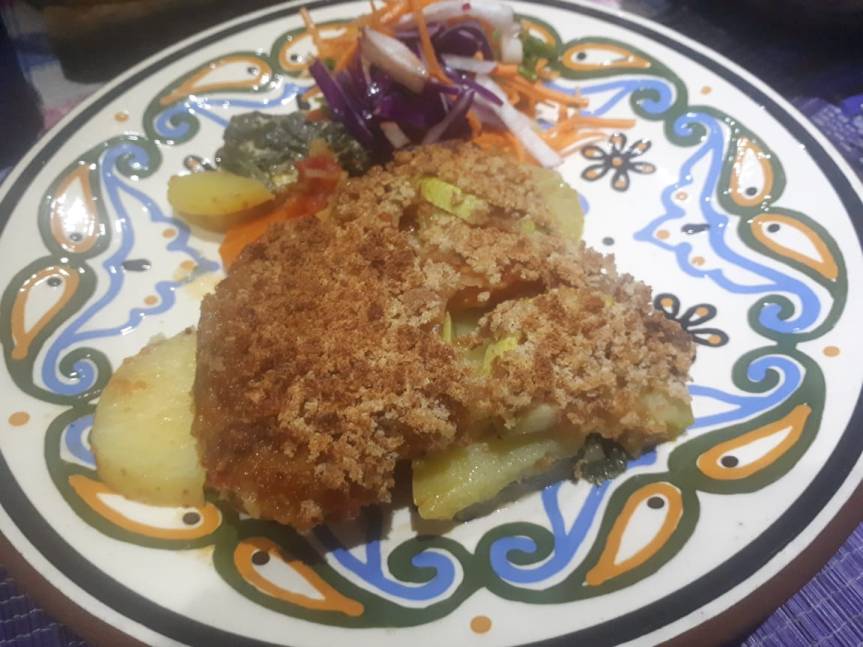
Greece has been in the headlines this week with the news that its beaches are reopening and it’s preparing to open its borders to tourists next month. This news brought back memories of holidays in the Greek islands and the great food in the tavernas. One of our favourite dishes is briam (pronounced bree-AM) – a delicious stew of oven-roasted seasonal vegetables.
Briam – good enough to eat
As usual, we’ve taken a few liberties with the recipe, omitting aubergines (usually a key ingredient) as they are not quite in season in Almaty yet, so foodie purists please look away. We’ve added carrot and spinach to the usual potatoes and courgettes and then cooked it slowly in a tomato sauce. We’ve also topped it with some breadcrumbs to enclose our briam.
The name briam has an interesting history – it is a borrowed word – there is no letter ‘b’ in the Greek alphabet, instead this sound is represented by combining the letters ‘μ’ (m) and ‘π’ (p) – ‘μπ’. Many Greeks call this casserole tourlou tourlou (all mixed-up), so briam could have come from Greeks who lived in Anatolia until the mass population exchanges in the early 20th century.
Briam and salad
In the Ottoman era, there was a word biryan, spelt büryan in modern Turkish, which refers to a side of lamb cooked slowly over charcoal in a pit in the ground – a speciality of Siirt in the Kurdish area on the borders with Iraq and Syria. This in turn could come from Persian, where biryan means roasted (notice the similarity with India’s biriyani). Whatever the name’s origin, it tastes great!
Ingredients (serves 4)
For the bake:
Two courgettes (approx 300 g)
Four potatoes (approx 300 g)
One carrot (approx 100 g)
200 g spinach
75 g breadcrumbs
For the tomato sauce:
One red onion
250 g tomatoes
One bunch of parsley
20 capers
25 ml olive oil
One teaspoon mustard seeds
250 ml vegetable stock or water
Method
Make the tomato sauce first. Heat the oil in a heavy based pan, add the mustard seeds and when they start to pop add the chopped onions and cook over a medium heat, stirring occasionally. After five minutes reduce the heat and add the chopped tomatoes. Stir and simmer for ten minutes then add the stock, chopped parsley and capers. Cook until the liquid has reduced by half.
Cook the spinach for a few minutes until it is beginning to wilt and then set aside. Cut the potato, courgette and carrot into 1 mm slices and put a layer of potatoes, then courgettes and then carrots into a greased baking dish. Add the spinach and pour half the tomato sauce over the vegetables. Add another layer of potatoes and courgettes and then pour the remainder of the tomato sauce over the layers. Spread the breadcrumbs over the top.
Cover with tin foil and bake in an oven at 180 c for around 1.5 hours. After an hour, remove the foil and cook for another 20-30 minutes until the breadcrumbs go start to go a golden brown colour. Keep an eye on it to make sure the breadcrumbs aren’t burning. Serve immediately with a fresh salad – it’s also great when it’s cooled down a bit.
We’re now nearing the end of the third week of Almaty’s lockdown. Life has settled into a pattern of venturing out as little as possible and relying more on what we have stored away. After a delve in the cupboards, we came up with one of the stalwarts of the staple food world – a pack of dried beans.
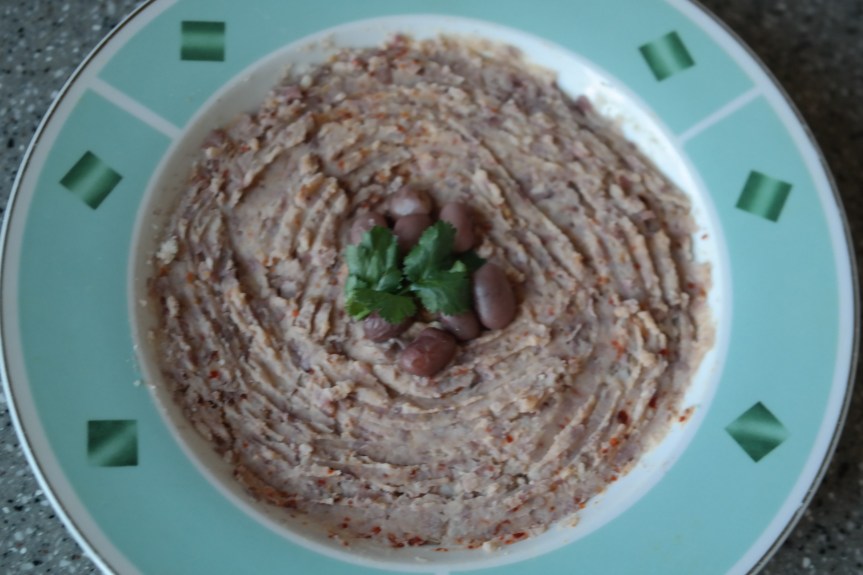
KCC’s Red-hot, red bean hummus
After soaking in cold water overnight, these red beans can be used in endless ways – from soups, stews and curries to burgers, salads and dips. We’ve gone for a easy-to-make red bean hummus; you’ll just need to add tahini, lemon juice, olive oil and some spices. Serve with flat bread and salad for a tasty lunch.
Toasted sesame seeds
Add olive oil, and you have tahini
Don’t worry if you haven’t got any tahini on hand, you can make your own by toasting some sesame seeds and mixing them with olive oil – here’s a link to last year’s post on DIY tahini.
Ingredients (makes around 300 g)
250 g cooked red beans (reserve 50 ml of the cooking water)
Two tablespoons tahini
25 ml olive oil
One lemon
One garlic clove
One teaspoon cumin seeds
One teaspoon sumac
Two teaspoons red chilli flakes
A few sprigs of coriander
Method
Mash the beans with a potato masher or a fork and add the tahini. Mix well then add olive oil and lemon juice and blend until you get a smooth consistency. If the hummus is too thick, use some of the cooking water, Add the minced garlic and spices and mix a bit more with the fork. Garnish with a few beans, a drizzle of oil, a sprinkling of chilli flakes and a sprig of coriander.
With movement getting ever more restricted in the lockdown — we’re now limited to not going more than 500 m from our flat in Almaty, which rules out big supermarkets for shopping trips, maintaining a supply of fresh ingredients is becoming more tricky – so this is the time when beansprouts come into their own…
This slideshow requires JavaScript.
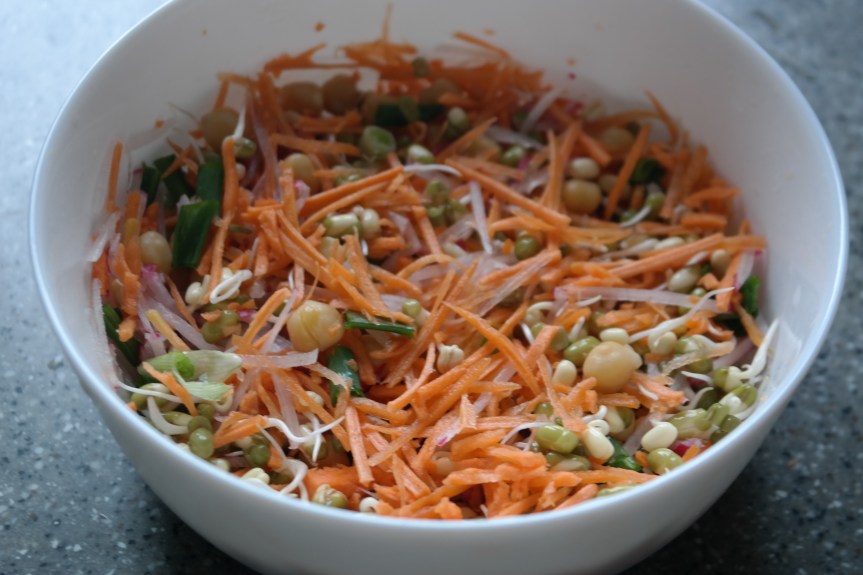
So, this time round we’ll be looking at some things you can do in the home, such as sprouting beans and lentils, to add a fresh, nutritious kick to your salads and stir-fries. We’ve gone for mung beans which are easy to sprout – your first crop will be ready in a matter of days and all you need is a glass jar and some mesh netting (we re-purposed a yoga mat bag by recycling the nylon mesh for our sprouter).
KCC’s sprout-powered salad with carrot, chickpeas, spring onions and radish.
Here are the steps for germinating mung beans:
Select clean, undamaged mung beans and wash them thoroughly.
Sterilise your glass jar and mesh lid with boiling water and/or in a hot oven.
Fill the jar about a quarter of the way with washed beans.
Soak the beans in cold water in the jar for at least four hours.
Drain off all the water and put the jar in a cool, dark cupboard.
Rinse the mung beans a few times a day with cold water and drain the liquid off.
After two or three days, your first crop will be ready for eating.
When the sprouts are around 2-3 cm long, put them in the fridge until using.
Warning: Raw bean sprouts can lead to food poisoning if not prepared in sterile conditions and regularly washed with clean water.
If the sprouts look slimy or smell strange, throw them away.
Once sprouted, store the sprouts in the fridge and try to use them as quickly as possible.
And don’t forget to wash your hands frequently, especially when preparing food.
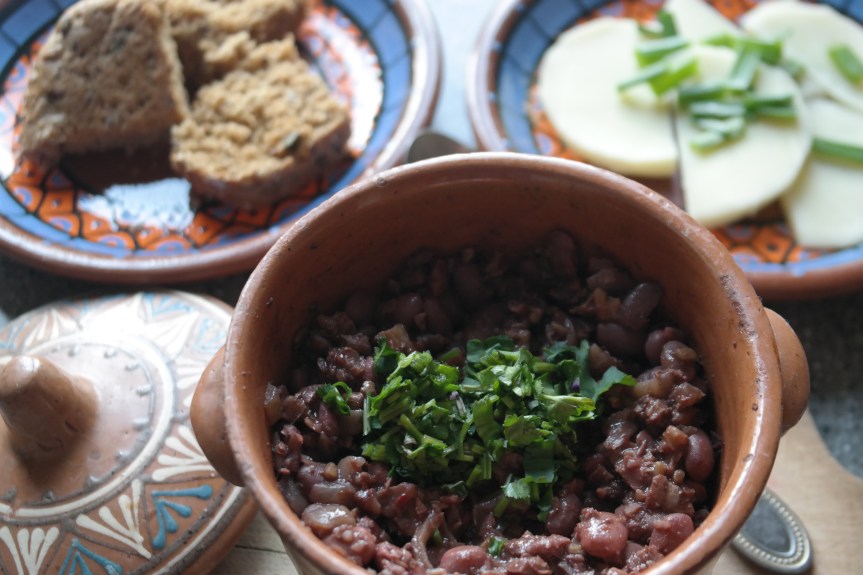
For this week’s lockdown lunch we had a root around the cupboards and came up with some dried red beans, last autumn’s walnuts and a bottle of Turkish pomegranate sauce (Nar Ekşili Sos) – perfect ingredients for taking us on a culinary away day to Tbilisi for a bowl of lobio, Georgia’s signature bean dish.
Take a trip to Georgia with KCC’s Lobio lockdown lunch
Lobio can be more like a soup, a stew, a salad or even re-fried beans depending on which region of Georgia it’s prepared in – we’ve gone for lobio nigvzit which is somewhere between a soup and a stew. Serve the lobio in a clay pot with white cheese and a hunk of fresh mchadi (corn bread – recipe link here) or any other bread for an authentic taste of Georgia.
To help pass the time during lockdown, here’s something on the etymology of lobio from @thomas_wier on twitter:
Weekly Georgian Etymology: ლობიო lobio, kidney bean stew w/ herbs & spices. From Persian لوبیا lôbiyâ, < Anc Greek λόβια, pl of λόβιον cowpea, < Akkadian 𒇻𒂠𒊬 lubbu, < Sumerian 𒇻𒂠𒊬 lub cowpea. Now a central part of Georgian cuisine, it's not attested until the 17th century. pic.twitter.com/Bhirdwz4FC
One teaspoon blue fenugreek (use fenugreek or cumin seeds if you can’t find this)
One teaspoon red chilli flakes
One small bunch fresh coriander
Three bay leaves
50 ml cooking oil
50 ml pomegranate sauce
250 ml water the beans were cooked in or vegetable stock
Method
If cooking dried beans, then soak 250 g of beans overnight. Change water and cook for one hour or so until the beans are just cooked but not yet falling apart. Remove from the heat and allow to cool.
Heat the oil in a heavy-based pan and add the coriander seeds and blue fenugreek. Cook for a few minutes and then add the diced onions, mashed garlic and chilli flakes. Cook for ten minutes over a low heat and then add the crushed walnuts and the pomegranate sauce. Cook for another five minutes.
Now add the drained beans, bay leaves and reserved cooking water. Leave to simmer until most of the liquid is absorbed. Stir frequently with a wooden spoon – don’t worry if the beans start to fall apart – they taste better like this and absorb more sauce.
Add the chopped fresh coriander and serve hot with bread and white cheese. It tastes even better if left overnight and reheated, but only add the fresh coriander after re-heating the mix.
With the novel coronavirus (COVID-19) pandemic showing no sign of abating, we’ve come up with a soup that is full of nutritious ingredients that can boost your immune system. A healthy diet combined with regular exercise is recommended to help strength your body’s ability to fight off infection.
KCC’s 3 Cs soup – Carrot, Coconut and Coriander
While our 3 Cs soup may not offer you guaranteed protection from coronavirus, it can certainly enhance your health. Its combination of anti-oxidant-packed carrots, garlic and onions, fibre-rich coconut and coriander and the anti-inflammatory properties of turmeric and ginger, should leave you feeling bolstered up and ready to face the crisis with renewed vigour.
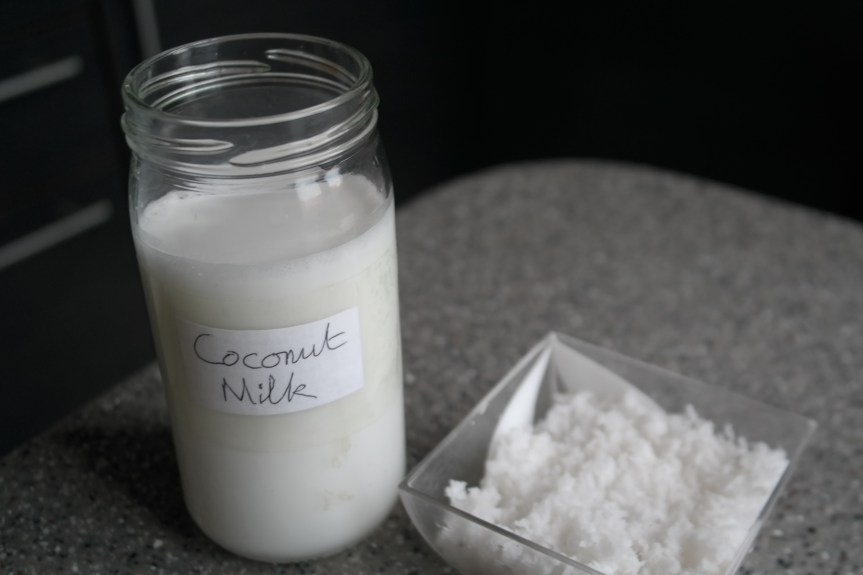
KCC’s homemade coconut milk
Zero Waste Tip: Coconut milk is easy to make at home – you don’t need to buy it in tins. Take 50 g of dried (desiccated) coconut and cover with 200 ml of hot water. Leave to stand for an hour or so. Liquidise with a hand blender or in a liquidiser on a low setting.
Pour the resulting mix through a fine sieve, pressing the coconut to produce more liquid – you should end up with about 200 ml of milk. Use the leftover coconut mass in soups, burgers, dhals, cakes, or smoothies. The coconut milk will keep for three to four days in the fridge – shake well before use as the cream will settle on the top.
Ingredients (for 4 servings)
500 g carrots
250 ml coconut milk
50 g dried coconut
2 medium onions
2 garlic cloves
1 cm knob of ginger
2 teaspoons coriander seeds
1 teaspoon ground turmeric
50 ml olive oil
500 ml vegetable stock
Fresh coriander to garnish
Method
Heat the oil in a heavy-based pan and then add chopped onion, garlic ginger, turmeric and ground coriander seeds. Stir and cook for five minutes over a medium heat and then add the finely grated carrots. Reduce the heat and cook for 5 more minute, stirring frequently.
Stir in the coconut milk and bring to a simmer, stirring occasionally. Now add the dried coconut and the rest of the stock. Allow the soup to simmer over a low heat for 20 minutes and then blend to a smooth consistency in a liquidiser or with a hand blender. Garnish with fresh coriander leaves before serving.
Don’t forget to wash your hands thoroughly before preparing and eating food.
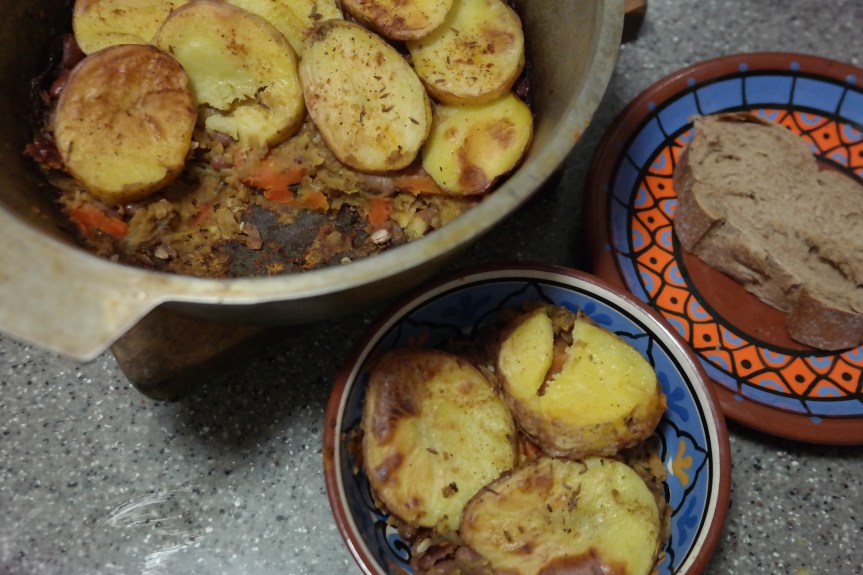
This time round on Knidos Cookery Club, we’re turning our attention to a winter classic from the UK – the Lancashire Hotpot. Our spiced up, veggie-friendly version replaces the meat traditionally used with red beans and red lentils and is topped off with sliced potatoes, helping to retain the hearty, comforting hit of the original.
This casserole originated in the north-west of England as a dish that could be left cooking slowly in the oven over a low heat while families worked from home spinning thread.
The term hotpot is thought to derive from the mixture of ingredients used, although it’s also claimed to be named after the clay pot originally used to cook the dish. It’s not to be confused with the Chinese Hotpotthat uses a steaming pot of stock placed in the centre of the table to cook ingredients.
Ingredients (serves 2)
125 g red lentils
250 g cooked red beans
3 medium potatoes
2 medium carrots
1 medium onion
1 stick of celery
1 garlic clove
50 ml olive oil
600 ml vegetable stock
1 teaspoon each of mustard seeds, coriander seeds, fenugreek seeds, cumin seeds, chilli flakes, turmeric
1 cinnamon stick
1 bay leaf
Method
Heat the olive oil in a casserole dish or an ovenproof pan. Fry the onions, garlic, ginger and spices all together for five minutes or so over a medium heat. Add the diced carrot and celery and cook for five more minutes. Add the lentils and 300 ml of stock and cook over a low heat until the water is absorbed and the lentils are cooked but not mushy.
While this is cooking, boil the potatoes (cut into 1/2 cm thick slices) for 10 minutes, pour off the water and cover with cold water. Add the cooked beans and the rest of the stock to the lentils and stir well. Place the potato slices in layers over the top of the stew and pour some olive oil over them.
Put the casserole dish or pan into an oven heated to 200 c and cook for 30 minutes at this temperature until the potato slices are starting to go a golden brown colour. Serve immediately in individual bowls with a hunk of bread.
This week’s offering – a soup made from chickpeas and carrots, was inspired by a recent visit to a funky Central Asian restaurant called Saksaul in Nur-Sultan, Kazakhstan. This soup appeared on the menu, but unfortunately there wasn’t any left that day. Spotting yellow carrots on sale in the market after returning home, we decided to cook up our own version.
KCC’s Golden Soup of Samarkand featuring yellow carrots and chickpeas
Our soup contains two ingredients that are common in the cookery of Samarkand in Uzbekistan – chickpeas and yellow carrots. Not all carrots are orange in Central Asia, you can even find black ones on occasion, but we find these yellow ones particularly sweet and tasty.
Yellow (and a bit green!) carrots on sale in Kazakhstan
This famed Silk Road city of Samarkand provided further inspiration for our golden potage with spices such as cumin, coriander and turmeric that are still bought and sold along this ancient trade route.
Ingredients (makes 4 portions)
500 g yellow carrots
500 g chickpeas
Two yellow onions
Two garlic cloves
Two teaspoons mustard seeds
Two teaspoons chilli powder
Two teaspoons cumin seeds
Two teaspoons coriander seeds
Two teaspoons turmeric
50 ml vegetable oil
One litre vegetable stock
Method
Heat the oil in a heavy-based pan and add the mustard seeds. When the seeds begin to pop, add the chopped onion and garlic and cook over a medium heat for five minutes. Add the other spices and mix well.
Next add the diced carrot and stir to coat the carrot with the mix. Cook for five more minutes, stirring occasionally. Add the chickpeas and stir well, then add the stock and reduce to a low heat and simmer the soup for 30 minutes or so.
Using a stick blender, liquidise the soup. Pour into bowls and garnish with chickpeas and a sprinkling of cumin seeds. Serve with bread – we used a flatbread but any crusty bread will work just as well.
Over the last few days, we’ve been experimenting with perfecting a batter to make pakora – a deep-fried snack from the Indian sub-continent. After testing a few recipes we’ve hit on a formula that can be used to coat a variety of vegetables from cauliflowers to carrots, parsnips to peas, and also cheese!
Halloumi pakora with potato wedges and peas
While on a recent visit to the UK, we came across battered halloumi on many menus – the squeaky cheese from Cyprus that stays firm when cooked. We’ve discovered that it makes a perfect partner for our pakora batter when deep-fried. We recommend you try it with this spicy Yemini sauce, zhug.
But you’ll need to be quick, as halloumi has been a victim of its own success. Severe global shortages of this versatile cheese are predicted as demand far outstrips supply. Luckily for us here in Kazakhstan, a local producer has started making a version of this cheese. We’re pleased to report that it tastes pretty good, so for now the crisis has been averted in our winter base.
Ingredients (makes enough batter for a sliced up 250 g block of halloumi)
100 g chickpea flour (also known as gram flour or besan)
One small onion
1 cm knob of ginger
One garlic clove
One teaspoon red chilli flakes
One tablespoon of fresh coriander
50-100 ml cold water
Method
Mix all the ingredients together with a fork or a whisk, adding water until you get a smooth consistency that is neither too runny not too thick with no lumps. Cover the batter with clingfilm and let it stand for an hour or so before using.
Heat a litre of cooking oil, we used sunflower oil but any will do, in a heavy-based pan over a medium heat until it reaches 180 c. To test the temperature, dip a chopstick or the handle of a wooden spoon in the oil – if the oil starts to bubble vigorously, then it is at the right temperature.
Slice a 250 g block of halloumi into eight pieces. Coat the halloumi slices in the pakora batter and drop into the oil. When the pakora rise to the surface and are a golden-brown colour, remove with a slotted metal spoon and drain on kitchen towel.
Serve hot with potato wedges or roast potatoes and minted peas. The pakora goes well with a coriander and coconut chutney – this site has a good recipe for this sauce, or with our zhugsauce.