Meet the Hasselback Potato

21 December 2022

Winter Solstice is upon us once again so it’s time to kick off the holiday season. If you’re looking for something a bit different for your festive feast this year, then look no further than the Hasselback potato, an attractive dish that tastes like a jacket potato crossed with a roast potato.

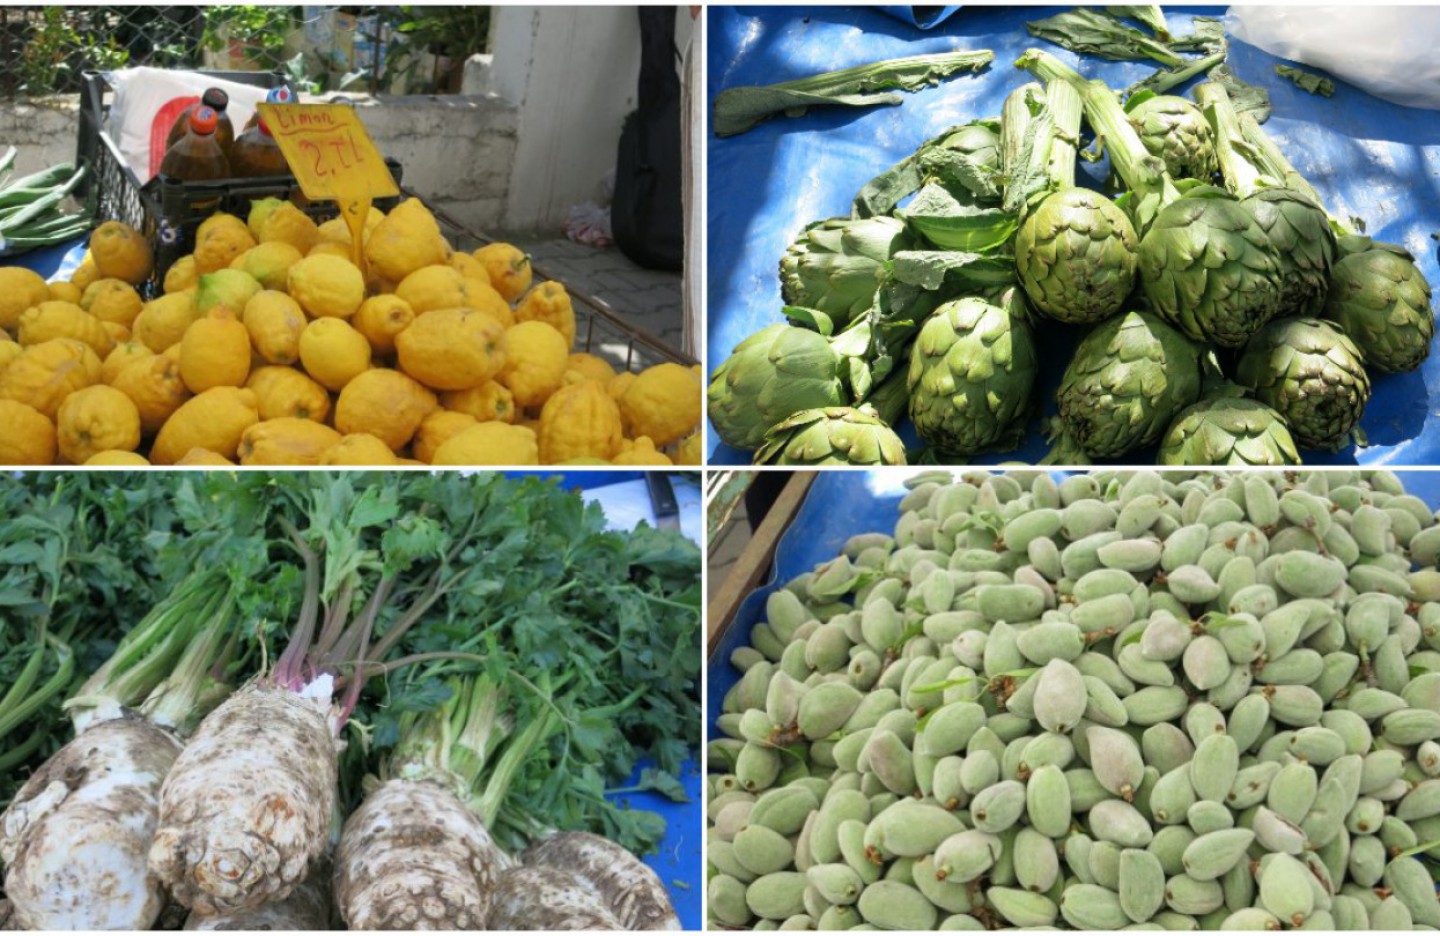
This method of preparation involves cutting the potato into thin slices that fan out while baking. It can be used for other vegetables like beetroot, carrot and butternut squash, as well as a sweet version using fruits like apple and quince.

Hasselback potato with a pasty and salad

Hasselback potatoes originated in Sweden with the dish featuring in a 1929 recipe book “The Princesses’ Cookbook” by Jenny Åkerström. In 1953. Lief Elisson, a rookie chef at Stockholm’s Hasselbacken restaurant, revived this method for preparing the humble spud.

Preparing the Hasselback

To prepare the fruit or vegetables of your choice, place chopsticks or wooden spoon handles on either side and cut into thin slices until the blade hits the wood.

Ingredients

  • Four medium potatoes
  • 25 ml olive oil
  • One teaspoon rosemary or thyme (fresh if available or dried)
  • One teaspoon cumin seeds

Method

  • Put two chopsticks or the handles of two wooden spoons on either side of the potato. Cut into 1-2 mm slices, cutting until the blade hits the wood.
  • Put the potatoes in an ovenproof dish with the cut side facing up. Drizzle liberally with olive oil and sprinkle cumin seeds and thyme (or rosemary) over them.
  • Bake in a pre-heated oven at 180 c for one hour. Serve on their own or as part of a main course with a pasty or nut roast along with your choice of side vegetables or a salad.

Chocolate Chilli Chana

3 February 2022

This time round on KCC we’re going for a chickpea, aka chana, chilli that includes a slab of dark chocolate to balance out the acidity of the tomato sauce – a combination that works surprisingly well.

Chocolate chilli chana

We first came across the dark chocolate infused mole sauce many years ago in a Mexican restaurant in Barcelona. It’s been on the list of things to cook for a while and having received a selection of Green and Black’s chocolate that included an 85% cocoa bean bar there were no longer any excuses not to try it out.

We served our chickpea chilli with some pearl barley – it’s also good with brown rice, couscous, bulgur wheat or some flatbread to mop up the chocolate rich sauce. We also recommend washing it down with a margarita or two.

Ingredients (makes 3-4 servings)

  • 300 g chickpeas (cooked)
  • 150 g carrot
  • 150 g onion
  • 50 g red lentils
  • 250 g tomatoes
  • 20 g dark chocolate
  • 25 ml olive oil
  • 150 ml aquafaba (chick pea cooking water)
  • 1 teaspoon cumin seeds 
  • 1 teaspoon coriander seeds
  • 1 teaspoon paprika (smoked if you can get it)
  • 1 teaspoon chilli powder (or chilli flakes)
  • 2 cm cinnamon stick
  • 5 cloves
  • 1 bunch fresh coriander

Method (Cooking time approx 45 minutes)

  • Heat the olive oil in a heavy-based pan and add the cumin seeds. When the seeds start to pop add the diced onion. Stir fry for five minutes over a medium heat and then add the diced carrots. Cook for five more minutes and then reduce to a low heat. Add the chopped tomatoes and cook for another five minutes.
  • Add the aquafaba, ground coriander seeds,  cinnamon, cloves, paprika and chilli powder and stir well. When the mix starts to bubble, stir in the red lentils. Simmer the mixture and after 15 minutes add the cooked chick peas. Cook for another 10 minutes over a low heat and then add the dark chocolate. 
  • Serve with pearl barley or a grain of your choice and garnish the Chocolate Chilli Chana with fresh coriander. Take a slug of margarita and enjoy! 

The Path to Perfect Pizza

26 November 2020

With much of 2020 spent at home there has been plenty of time this year to hone our baking skills here at KCC. Over the past few months we have been experimenting with the base for an old favourite, pide (Turkey’s take on the baked dough and cheese combo), with an eye to creating a perfect pizza base that is soft and springy but with a crispy crust and we’re well pleased with our latest efforts.

After testing bases made from plain wheat flour, wholemeal flour or rye flour but found that these resulted in a denser base so we tried a more finely-milled flour, similar to Italy’s 00 standard, and found that this gave the best results with a fluffy but crispy base.

With tomato supplies running low (and being too lazy to brave the icy conditions outside), we improvised with crushed avocado in place of tomato sauce and hit upon a winning combination. Add some melty mozzarella, chunks of artichoke and slices of tomato to complete the taste sensation!

Ingredients (makes an eight-slice, 30 cm pizza)

  • 150 g pizza flour (00 grade) 
  • 30 ml olive oil
  • Dried yeast (use according to pack instructions)
  • 75 ml water

Toppings

  • One avocado
  • One medium tomato
  • Artichoke hearts
  • 150 g mozzarella 
  • One teaspoon dried mixed herbs (of your choice)

Method

  • Sieve the flour into a large mixing bowl and add the olive oil and mix with a wooden spoon. Add the dried yeast (according to the instructions on the pack) and then slowly add the water, mixing all the while.
  • Use your hands to form the dough into a ball and knead gently for ten minutes or so. Leave to rise in a warm place in an oiled bowl with a damp tea towel over the top for an hour or so.  After 30 minutes, turn the oven on and heat to 200 c. 
  • Roll the dough into a 30 cm round on a lightly-floured surface and then spread crushed avocado over the base. Arrange strips of mozzarella on top of the avocado. Put tomato slices on top of this and then add chunks of artichoke. Sprinkle with mixed herbs if using.
  • Bake the pizza on the top shelf of the oven for 10 – 15 minutes or until the cheese starts to bubble and brown and the edges of the crust turn a golden brown colour.

Hash Greens: More Mücver Variations

17 September 2020

This time round on KCC we’re returning to mücver, Turkey’s versatile courgette fritter, with our take on that brunch staple Hash Browns. This mücver variation adds potato and garlic scapes to the mix to give us a fritter we’ve dubbed Hash Greens.

These fritters are super-easy to prepare and cook and are great as part of a breakfast or brunch. They can also be served in a roll to make it closer to a veggie burger.

We came across garlic scapes, the edible stem that grows from the bulb, on a recent visit to the local greengrocer while looking for green beans. This flavoursome peduncle gives a milder garlicky kick to soups, pestos and stir fries. It’s not an overpowering flavour as it adds a subtler, roasted garlic undernote to these dishes.

Ingredients (Makes 6-8 fritters)

  • One medium courgette (zucchini) (approx 200 g)
  • One medium potato (approx 200 g)
  • One small onion (approx 100 g)
  • 50 g garlic scapes
  • 100 g chickpea flour
  • 25 g mixed fresh herbs
  • One teaspoon cumin seeds
  • One teaspoon chilli flakes
  • One teaspoon turmeric
  • One teaspoon black pepper
  • 50 ml olive oil

Method

  • Grate the potato and courgette and mix together in a large bowl. Finely chop the garlic scapes and add to the bowl. Stir in the chickpea flour and add the herbs (use and fresh herbs you have e.g. parsley, coriander, mint) and spices and mix well so you have a smooth that’s neither too dry and crumbly nor too wet and sloppy.
  • Heat the oil in a frying pan. Form the mix into golf-ball sized patties and then put in the pan and flatten with a fish slice or spatula. Fry until golden-brown on both sides. Serve as part of a breakfast or brunch or in a bun as a burger with toppings of your choice.

Brush up your Bruschetta Skills

2 July 2020

This week were honing in on a favourite Italian starter, bruschetta – slices of toasted bread served with a range of different toppings. We’ve opted for a heartier version using chunky slices of bread that can double up as a main meal when you add a salad of your choice.

20200528_133608

In Italy the slices of bread are toasted on a brustolinaa device made from sheet metal with holes on the bottom and a wire rack on the top (see pictures below taken from the Grand Voyage Italy website). This is placed over the heat source on your stove top and can be used to make toast, grill polenta and roast peppers, courgettes or aubergines.

Being unable to make it to Italy to pick up a brustolina at this point in time due to the pandemic, we’ve had to make do with our oven to toast the bread. Brush your thickly cut  slices with olive oil and a rub of garlic and cover one side with a topping of your choice.

20200528_133222

We went for capers, sun-dried tomatoes and black olives with thin slices of courgette and basil leaves for the first option and home-made guacamole, topped once again with thin slices of courgette and basil leaves, for option two. Simply leave in a hot oven (200 c) for ten minutes or so until the bread just begins to burn at the edges. Serve immediately with your favourite salad.

Falafel to the Fore

18 June 2020

This time round on Knidos Cookery Club we’ll be taking an armchair culinary tour to the Middle East and looking at the origins of the humble falafel. Arguments abound as to where this street snack par excellence originated, but most likely it was Egypt according to the evidence.

SAMSUNG CSC
Millet falafel, anyone?

The Egyptian version of this tasty bite is usually made with fava beans, known as fūl in Arabic, which is thought to be the base for the name falafel , whilst in other parts of the Mediterranean region chickpeas are preferred.

SAMSUNG CSC
Falafel salad

With both chickpeas and fava beans in short supply in Almaty at the moment, it was back to the drawing board to look for an alternative base for our falafel. While stocking up during lockdown in our local shop we came across a pack of millet and a spot of googling revealed that this would work just fine as the base for our take on the falafel.

SAMSUNG CSC
Forming the falafel

We baked them in the oven rather than deep-fried them as it’s a lot less hassle. Be sure to use plenty of parsley, cumin, coriander and chilli powder to spice up the millet. The resulting falafel were crisp on the outside but soft and fluffy in the centre, just as they should be.

SAMSUNG CSC
Bake the falafel in the oven

Be careful when cooking millet as it has a tendency to stick to the pan if you don’t keep an eye on it and stir regularly. We found it best to rinse and soak it for a few hours before cooking as this reduces the time needed to cook it.

Ingredients (makes 12-16 falafel)

  • 150 g millet
  • 300 ml water or vegetable stock
  • one garlic clove
  • one bunch of parsley
  • one teaspoon cumin
  • one teaspoon coriander
  • one teaspoon chilli powder
  • Sesame seeds to coat the falafel

Method

  • Rinse and then soak the millet in a pan for four hours. Drain the millet and cover with water or vegetable stock. Bring to a boil and then simmer until the liquid is absorbed. Stir regularly as the millet will stick to the bottom of the pan if not watched carefully.
  • Finely chop the parsley, both leaves and stalks, mince the garlic clove and add to the cooked millet. Add the spices – if you want to give your falafel more oomph, double the amount. Mix well and then form into balls. Roll the balls in the sesame seeds and then place on a tray and oven bake for 20 minutes at 200 c, or until the falafel turn a golden-brown colour.
  • Serve in pita bread with salad and sauces of your choice or as part of a salad – we made one from cucumber, tomato, spring onion, celery, red cabbage and radish. These falafel will keep in the fridge for a few days so you can cook a large batch at the same time.

Lockdown Lunch: Get Stuffed!

23 April 2020

Nearing four weeks of lockdown in Almaty and supplies are holding up surprisingly well, especially now that spring greens are beginning to come on tap. This week our local veg shop had rocket, celery and sorrel – all the makings of a peppery green salad to perk up the lunch menu.

20200422_143130
Spring greens coming on tap in Almaty

We’re coming to the end of our super-sized cabbage, which was bought in the early days of lockdown, so we decided to use the remaining leaves to make cabbage rolls, a popular dish in eastern and southern Europe.

SAMSUNG CSC
KCC’s Stuffed Cabbage Leaf

We stuffed the leaves with some rip-red risotto, a recipe we made a few years back that combines coarse bulgur wheat with beetroot and walnuts (if you want a gluten-free option, you can use arborio rice or pearl barley instead).

This slideshow requires JavaScript.

Simmer the stuffed cabbage parcels in a tomato and herb sauce for thirty minutes for a winning lockdown lunch. It makes for a tasty veggie take on that beloved Ukrainian / Russian dish, golubtsi, or ‘little doves’, or dolma as they are dubbed in some parts of the Mediterranean and into the Caucasus.

Ingredients (serves 3-4 people)

  • Four large cabbage leaves or eight smaller ones
  • (See here for the stuffing: rip-red risotto)

For the tomato sauce:

  • Three medium tomatoes
  • Three spring onions
  • Three sprigs of parsley
  • One stick of celery
  • One tablespoon tomato paste
  • One teaspoon mustard seeds
  • two or three basil leaves
  • 25 ml olive oil
  • 100 ml water

Method

  1. Separate the leaves carefully from the cabbage. Place in boiling water for five minutes to soften. Put the leaves in cold water and then drain. Cut out the tough, lower bit of the stalk (about 2-3 cm). Place a tablespoon of filling above the cut and then fold and roll the leaves into cigar shapes.
  2. To make the sauce, heat the olive oil in a frying pan, add the mustard seeds and when they start to pop, add the chopped spring onions, celery and parsley. Cook for five minutes and then add the chopped tomatoes. Add the tomato paste and water , stir well and bring to the boil.
  3. Lay the stuffed leaves in an ovenproof baking dish and pour the hot tomato sauce over them. Cover the dish with tin foil and bake at 200 c for thirty minutes. Sprinkle the cooked cabbage leaves with basil leaves before serving with a green salad.

Put a Bit of Zhug in your Life

14 November 2019

On a recent flying visit to Glasgow, KCC dropped into Ox and Finch in the city’s West End for a bite to eat. This Sauchiehall Street eatery offers a range of tapas-style sharing plates – we opted for the giant couscous with grilled halloumi, a plate of braised leeks, beetroot hummus, grilled baby gem lettuce and, with this being Glasgow, chips of course. 

20191114_140452
A spicy bowl of zhug sauce

This time round, we’ll be recreating the giant couscous dish, made with ptitim, toasted pearls of wheat and semolina, first cooked up in Israel in the 1950’s when rice was in short supply in the early days of the Israeli state. This couscous relative was dubbed Ben-Gurion rice after Israel’s first prime minister. After scouring our local supermarkets, ptitim proved to be in short supply so we’ve replaced them with mung beans!

20191108_222230
Mung beans, zhug, halloumi, pomegranate and pumpkin seeds

Key to this salad is the dressing, a piquant sauce called zhug,  which was brought to Israel by emigrées fleeing persecution in Yemen in the late 1940s. This spicy cousin of Italy’s milder pesto and Mexico’s equally fiery salsa verde, is served often alongside falafel and hummus. The name is said to be derived from mas-chag, the name of the grinding stone traditionally used to crush the spices and herbs into a paste.

Ingredients (serves 2-4)

  • 100 g mung beans
  • 125 g halloumi
  • Sprinkling of pomegranate seeds
  • Sprinkling of roasted pumpkin seeds

For the zhug sauce:

  • One bunch fresh coriander
  • One bunch fresh parsley
  • One garlic clove
  • Two teaspoons red chilli flakes
  • One teaspoon black peppercorns
  • One teaspoon cumin seeds
  • One teaspoon coriander seeds
  • One teaspoon cardamom seeds
  • Juice of half a lemon
  • 25 ml olive oil

Method 

  • To make the zhug sauce, put all the ingredients except for the olive oil in a blender and give it quick blitz. Don’t overdo the blending as you want a slightly chunky texture. Now slowly add the olive oil, blitzing until it is mixed in with the other ingredients. Put in a glass jar – it should keep for a couple of weeks in the fridge.
  • Cook the mung beans until tender. While the mung beans are cooling, grill the halloumi until a golden-brown colour. Then mix the cooled mung beans with a tablespoon of zhug, arrange the grilled halloumi on top, sprinkle with pumpkin and pomegranate seeds and serve with a selection of your favourite meze dishes.


The Turk-Mex Chronicles: Corny Courgette Fritters (aka Return of the Mücver Variations)

3 October 2019

This time round on Knidos Cookery Club we’re adding to the recipe bank of our Turk-Mex influenced cuisine. We’ve taken a Turkish favourite, mücver, a fritter made from grated courgettes, and added a Mexican staple, corn, to create our latest mücver variation.

20190927_224339

It’s believed that corn was first domesticated in southernMexico around 9-10,000 years ago. From there it slowly spread across the Americas before finding its way into Europe in the 16th century; brought back by the explorers who had landed in what became dubbed ‘The New World’.

These tasty fritters can be served like a burger in a bun, wrapped in a tortilla, stuffed into a pita bread or just plain with a jacket potato and some salad for a healthy snack that can be eaten at any time of the day.

Ingredients (makes around 8 large fritters)

  • Two courgettes
  • One corn cob
  • Three tablespoons wholemeal flour
  • 75 ml olive oil
  • Two teaspoons cumin
  • Two teaspoons red chilli flakes
  • Two teaspoons dried thyme
  • One teaspoon turmeric

Method

  • Bring a pan of water to boiling and then switch off the heat. Soak the corn cob in the boiled water for five minutes and then put in a pan of cold water. Remove the kernels by slicing downwards with a knife on the sides of the cob.
  • Grate the courgettes into a large bowl and mix with the flour, herbs and spices, reserving 25 ml of the olive oil for cooking. Add the corn kernels and mix well. Leave the mix to stand for a few hours in the fridge.
  • Heat the remaining olive oil in a frying pan. Take a golf ball sized scoop of the mix and put it into the pan and flatten it with a spatula. Cook over a medium heat for five minutes and then flip over and cook for another five minutes. Alternatively, you can bake the fritters in the oven for 30 minutes at 180c or grill on a barbecue.


Putting on the Piyaz: Turkey’s Versatile White Bean Salad

2 August 2019

Knidos Cookery Club has just arrived back at its home base on the Datça Peninsula in Turkey. We’re going to soak up some more culinary inspiration from the place where the Mediterranean and Aegean Seas meet around the ancient Greek settlement of Knidos.

20190802_125534-e1564740306182.jpg
Piyaz – Turkish White Bean salad

To celebrate being back in Turkey, we’ve prepared a piyaz salad, one of the classic dishes of Turkish cooking, that combines small white beans with some readily available staples of the local kitchen; namely tomatoes, onions, green peppers, parsley and lemons.

20190801_160820.jpg
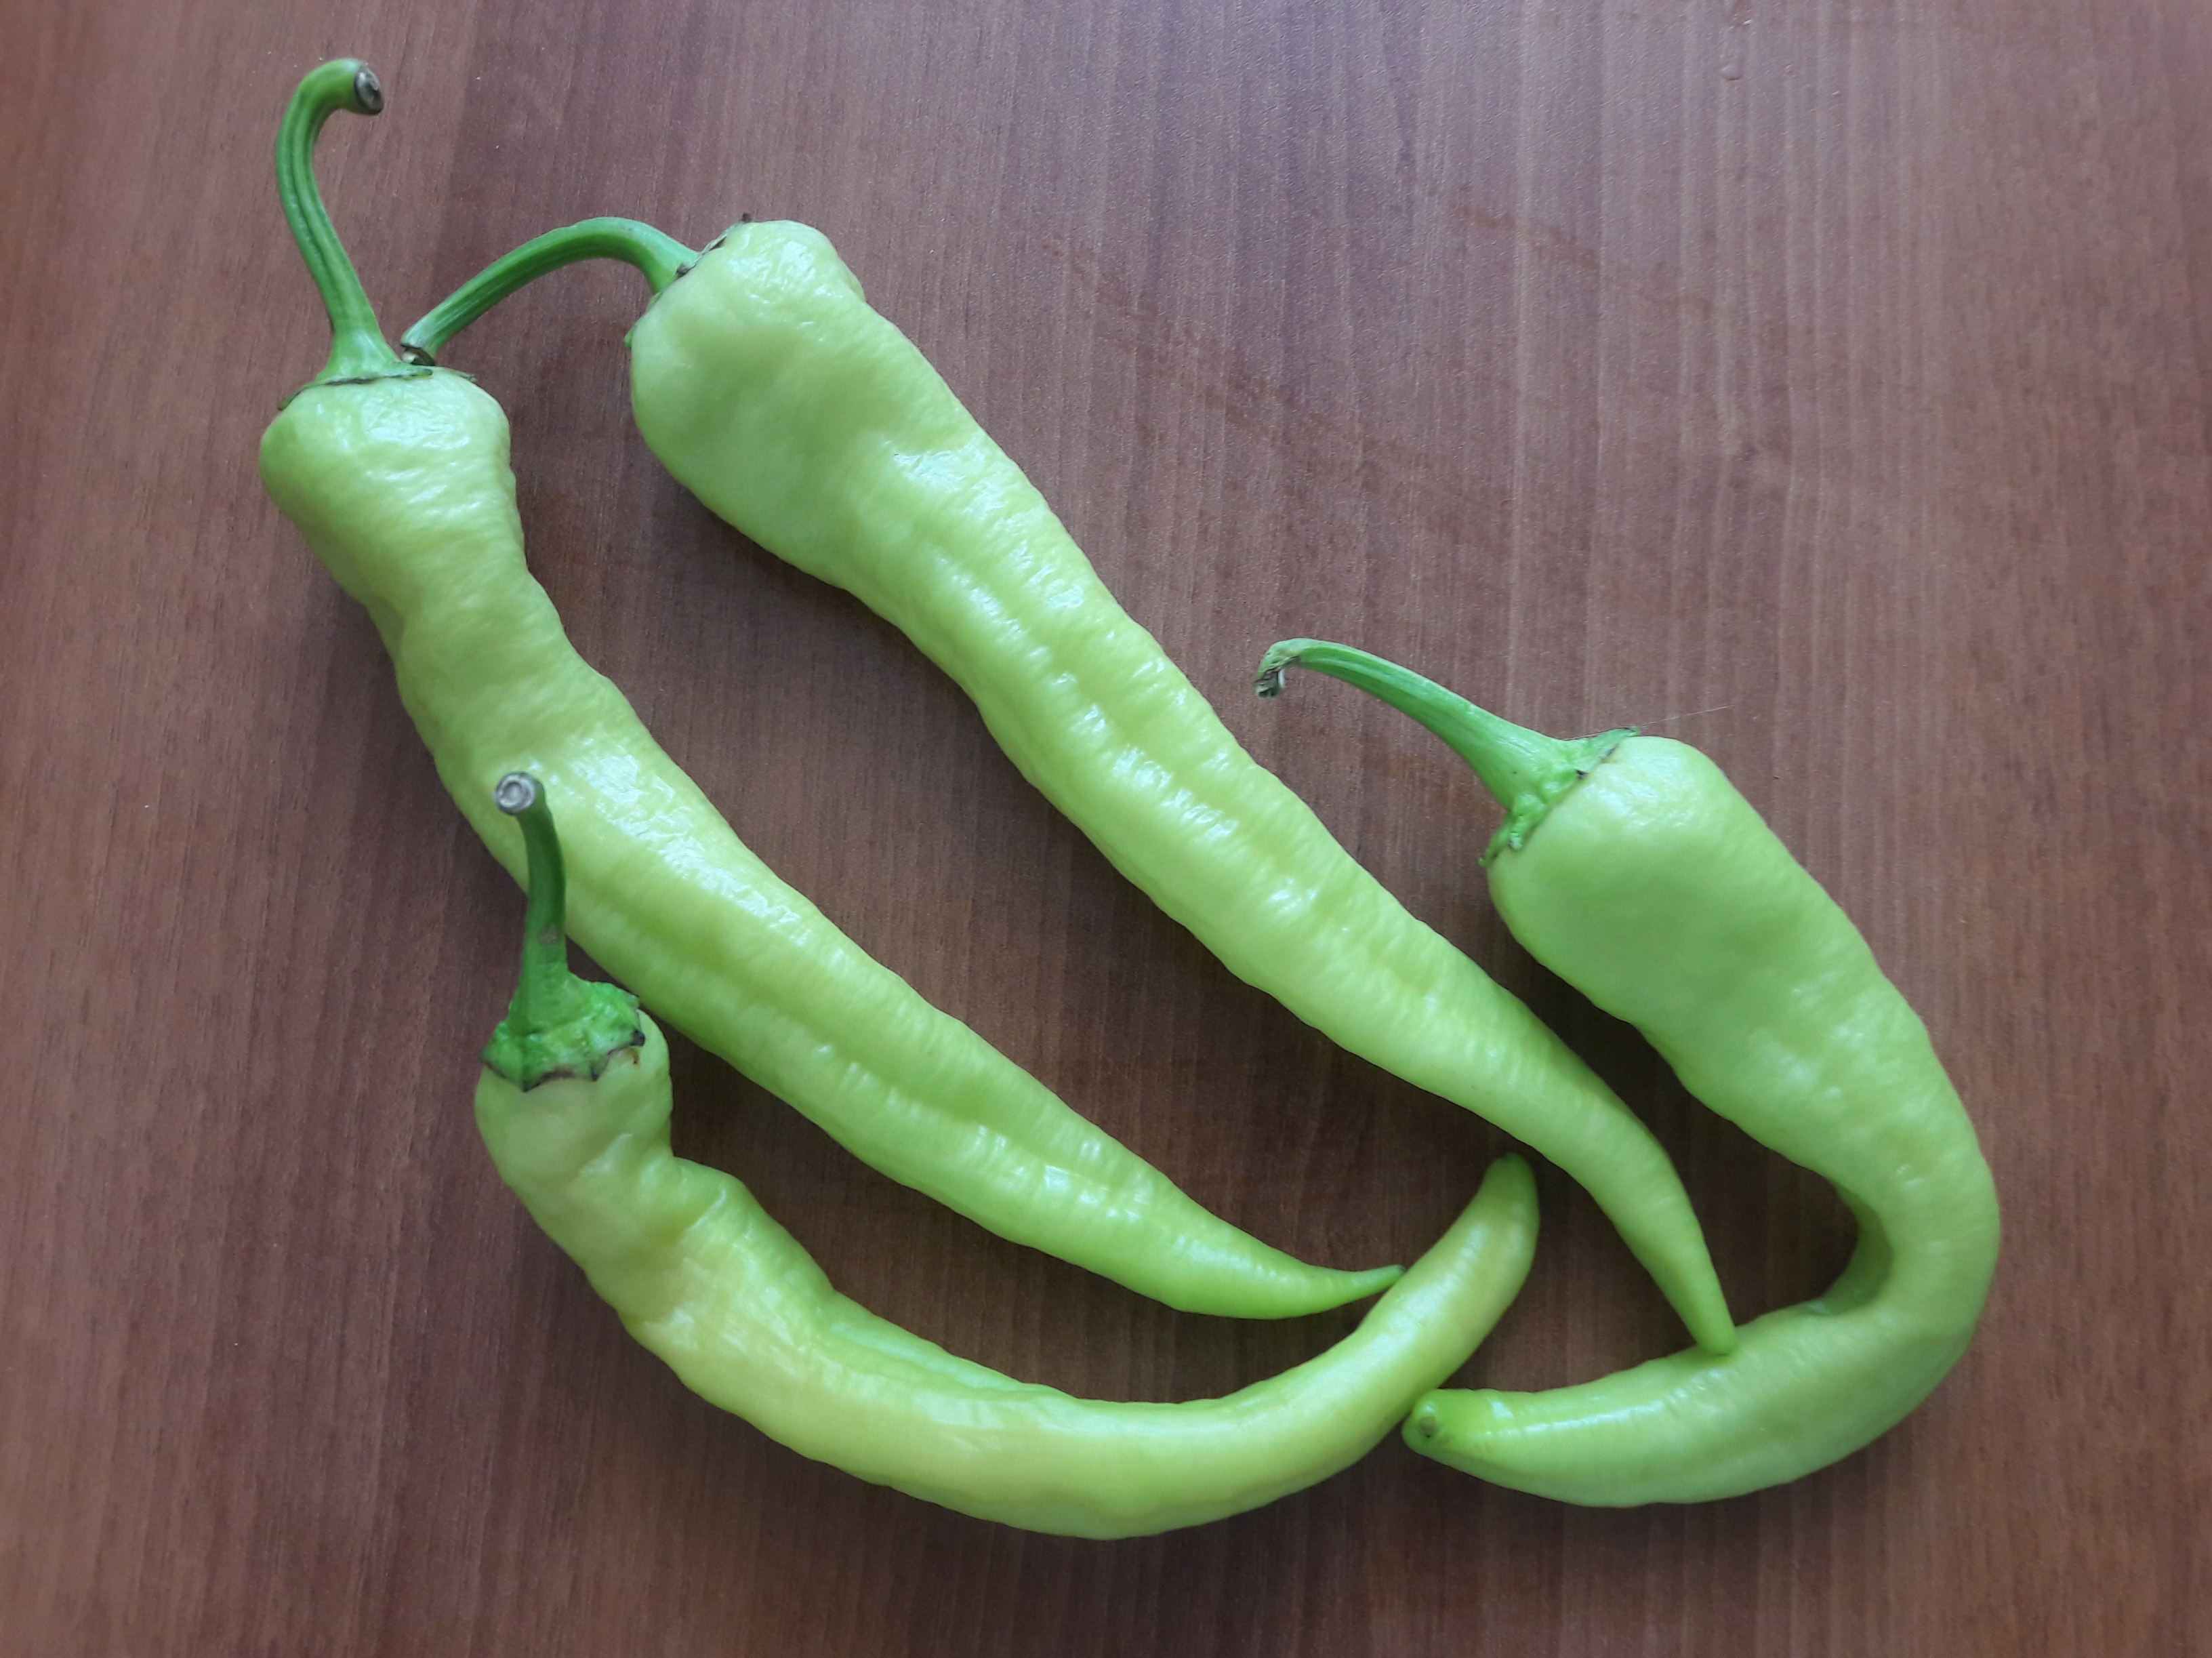
Turkey’s çarliston peppers aka banana peppers

The secret of this dish is in getting the beans just right – not too mushy but not too firm either. They need a good, long overnight soak and some slow cooking to achieve the required consistency.

The dressing used varies across Turkey from the basic lemon, olive oil and apple vinegar one favoured in Istanbul to the tahini-infused one from Antalya, paying tribute to the Arabian influence from the Middle East on the city’s cuisine. We have opted for the creamy, nutty taste of the latter.

Ingredients (makes 3-4 servings)

  • 200 g dried haricot beans or other small white beans soaked overnight
  • 1 medium-sized plum tomato
  • 1 long, green pepper (e.g. çarliston pepper – see photo above)
  • 1 small onion
  • 2 lemons
  • Small bunch of parsley
  • 50 ml olive oil
  • 50 ml apple vinegar
  • 25 ml tahini
  • 2 teaspoon dried thyme
  • 1 teaspoon red chilli flakes
  • Optional: Two boiled eggs or one avocado

Method

  • Cook the beans over a low heat until tender but not starting to go mushy. When cooked, drain off the cooking water, reserving 100 ml to make the dressing. Pour the vinegar and sprinkle the thyme over the beans and leave to cool.
  • After leaving for a few hours, add the vinegar the beans were soaking in to the reserved bean juice and then blend with the olive oil, tahini and the juice of one lemon to make a smooth sauce.
  • Finely dice the tomato, slice the pepper and onions into rings and chop the parsley finely. Add these to the beans.
  • Cover the salad and put it in the fridge for a few hours. Serve with wedges of the second lemon and sprinkle the red chilli flakes over the salad.
  • Just before serving, pour the dressing over the bean salad and season with black pepper and gently mix all the ingredients together with a wooden spoon.
  • You can garnish with quarters of boiled egg if you wish or, for a vegan twist, you can garnish the salad with slices of avocado.