If you’re a purist who believes that fruits have no business being in salads, then this is not the place for you. At KCC we have no such qualms about mixing vegetables and fruits. In the past we’ve featured a salad with raspberries, one with grilled peaches and another with watermelon, to name a few. As long as something salty, like feta or halloumi cheese, is included to counterbalance the sweetness, then adding fruit to to your salad is fine in our book.
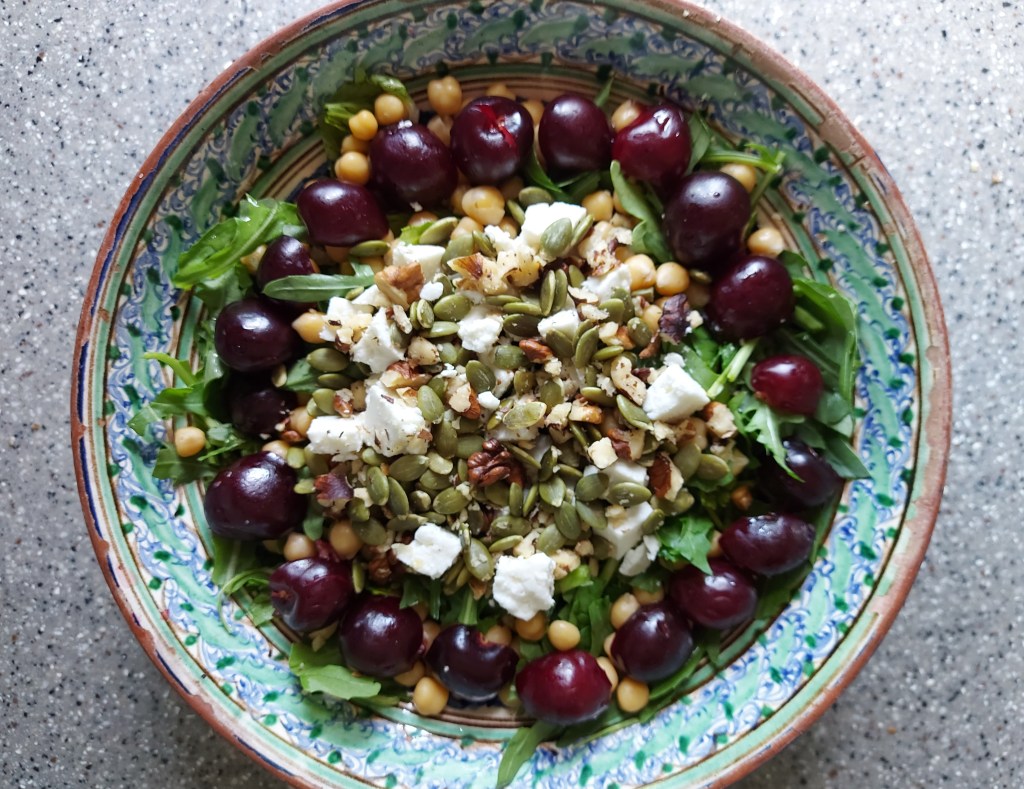
A rocket-fuelled cherry, chickpea, feta and walnut salad
Cherries are at their peak at this time of the year. Whatever variety you can get your hands on – sweet or sour, both work fine in this salad. Prepare a bed of rocket and celery, top with chickpeas, pumpkin seeds, walnuts and feta, arrange the cherries around the edge and dress with pomegranate sauce and olive oil to make a balanced meeting of sweet and sour in this early summer special.
This time round on KCC we’re going for a chickpea, aka chana, chilli that includes a slab of dark chocolate to balance out the acidity of the tomato sauce – a combination that works surprisingly well.
Chocolate chilli chana
We first came across the dark chocolate infused mole sauce many years ago in a Mexican restaurant in Barcelona. It’s been on the list of things to cook for a while and having received a selection of Green and Black’s chocolate that included an 85% cocoa bean bar there were no longer any excuses not to try it out.
We served our chickpea chilli with some pearl barley – it’s also good with brown rice, couscous, bulgur wheat or some flatbread to mop up the chocolate rich sauce. We also recommend washing it down with a margarita or two.
Ingredients (makes 3-4 servings)
300 g chickpeas (cooked)
150 g carrot
150 g onion
50 g red lentils
250 g tomatoes
20 g dark chocolate
25 ml olive oil
150 ml aquafaba (chick pea cooking water)
1 teaspoon cumin seeds
1 teaspoon coriander seeds
1 teaspoon paprika (smoked if you can get it)
1 teaspoon chilli powder (or chilli flakes)
2 cm cinnamon stick
5 cloves
1 bunch fresh coriander
Method (Cooking time approx 45 minutes)
Heat the olive oil in a heavy-based pan and add the cumin seeds. When the seeds start to pop add the diced onion. Stir fry for five minutes over a medium heat and then add the diced carrots. Cook for five more minutes and then reduce to a low heat. Add the chopped tomatoes and cook for another five minutes.
Add the aquafaba, ground coriander seeds, cinnamon, cloves, paprika and chilli powder and stir well. When the mix starts to bubble, stir in the red lentils. Simmer the mixture and after 15 minutes add the cooked chick peas. Cook for another 10 minutes over a low heat and then add the dark chocolate.
Serve with pearl barley or a grain of your choice and garnish the Chocolate Chilli Chana with fresh coriander. Take a slug of margarita and enjoy!
The anniversaries are coming thick and fast here at Knidos Cookery Club and to celebrate our 150th post we’re bringing you a hassle-free recipe for pakora, a spicy fritter from the Indian subcontinent, that can be prepared in under 30 minutes.
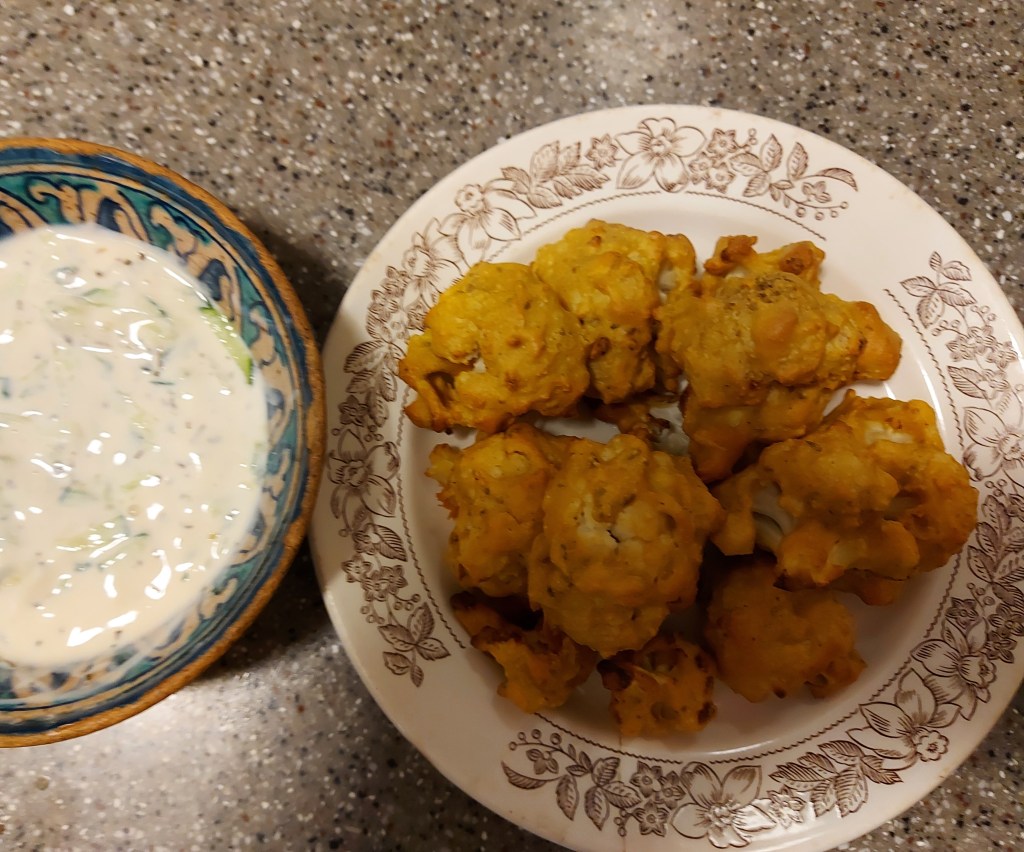
Cauliflower pakora meets cucumber raita
Pakora are a great snack that you can eat at any time of the day and are easy to make – just coat vegetable or paneer cheese slices with a spiced chickpea flour batter and then deep-fry them. For a more user friendly and healthier take on this street food classic, you can bake them in the oven as we did with this batch.
We’ve used cauliflower to make pakora this time round, but you can use onion, carrot, potato, peppers, mushrooms or combinations of more or less any vegetable you have handy. Paneer cheese (or halloumi) also works well with this versatile batter. We like to serve the pakora straight from the oven with a yogurt-based cucumber raita to dip them into.
Ingredients (makes enough for 3-4 people)
100 g chickpea flour (also known as gram or besan)
100 ml water
250 g cauliflower broken into florets
One teaspoon each of: chia seeds, cumin seeds, turmeric, ginger, chilli powder, black pepper
Method
Heat the oven to 200 c. Put the chickpea flour in a large bowl and add the seeds and spices. Slowly add the water and mix to form a batter that is neither too dry nor too runny. Stir in the cauliflower florets and coat thoroughly.
Place the individual florets on a baking tray and cook in the top half of the oven for 20 minutes or so – keep an eye on them and if they start to char a bit then they are ready.
Serve them straight away with a raita sauce made from yogurt, cucumber and mint.
Today we’re celebrating KCC’s 5th anniversary with a hearty plate of laghman, hand-pulled wheat noodles, one of Central Asia’s favourite dishes. These thick, chewy noodles are often served with a rich, spicy sauce but we decided to make a drier version with spring greens and chickpeas.
KCC’s Leafy Green Laghman
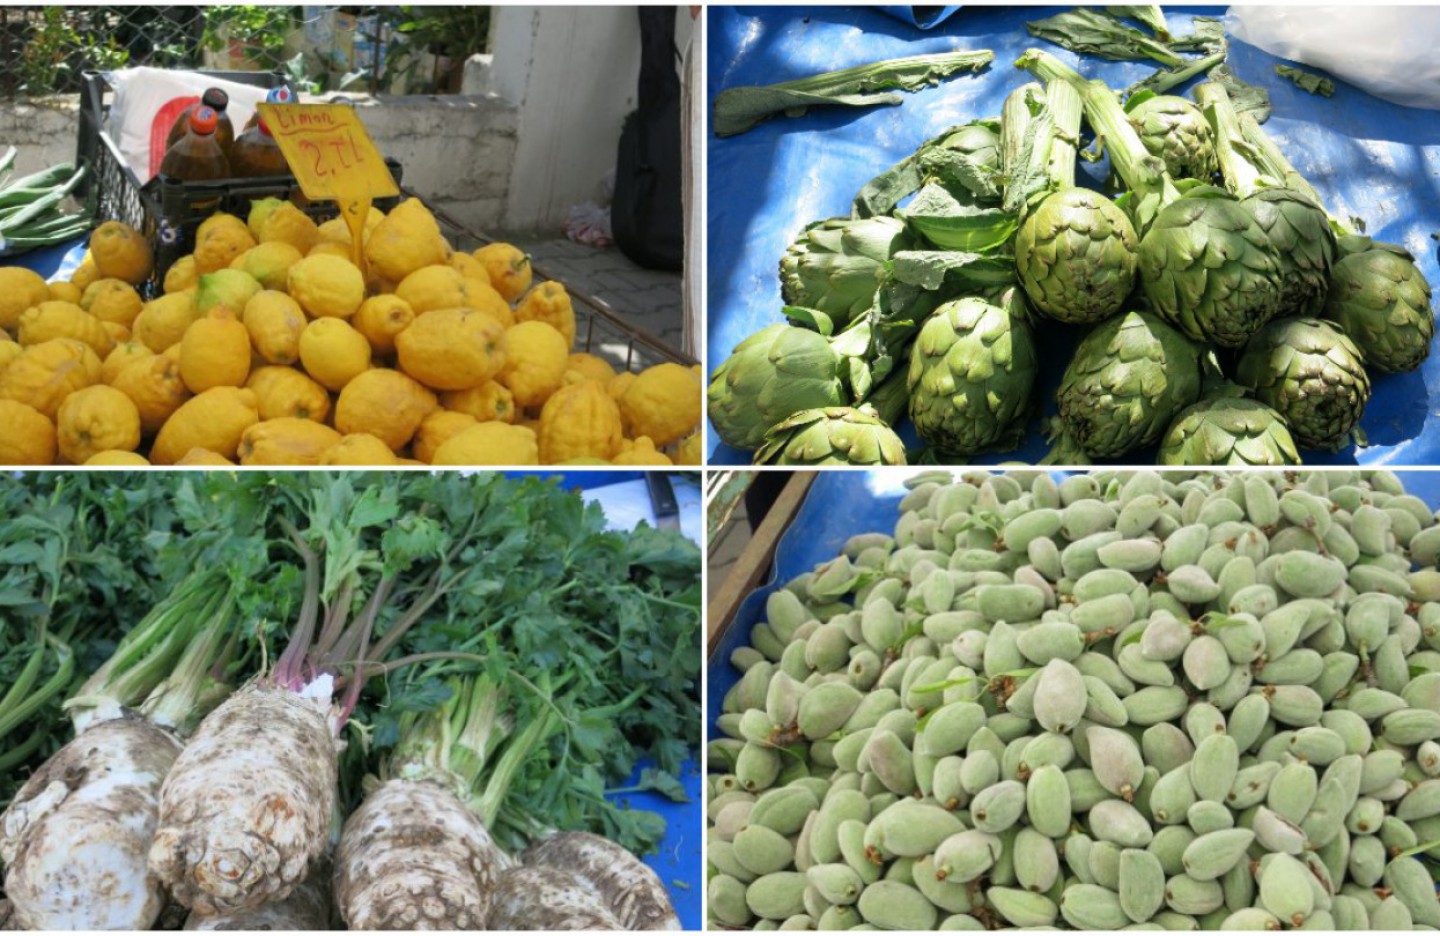
We can’t believe that it’s been five years since we started our culinary journey in Datça, Turkey. KCC’s first recipe was this asparagus risotto, inspired by the fresh produce on sale in the town’s weekly market.
Over the last five years, we’ve branched out from Turkey and sought out dishes from around the globe with gastronomic excursions to Greece, Georgia, Russia, Albania, Italy, India, Sri Lanka, Central Asia and Mexico among others.
Since the start of the pandemic KCC has been confined to Almaty, Kazakhstan, so we’ve been trying out new recipes based on locally sourced ingredients which brought us to laghman.
When it came to making this dish we cheated a bit – Gulzada, our local greengrocer, now offers home made noodles along with whatever fruit and vegetables are in season.
If your local grocer doesn’t stock noodles and you have the time to pull your own noodles, then check out this recipe to make the key ingredient for your laghman.
Ingredients (for 3-4 servings)
150 g noodles per person
200 g mixed greens – we used cauliflower and radish leaves but you can use anything you have handy
200 g leek
50 g garlic chives (jusai)
50 g celery
350 g cooked chickpeas
100 ml chickpea cooking water (aquafaba)
One teaspoon cumin seeds
One teaspoon red chilli flakes
50 ml olive oil
Method
Heat the olive oil in a heavy-based pan and add the cumin seeds. Wash the leek thoroughly and then chop in half lengthways and then cut into 1 cm slices. Use as much of the leek as you can including the leafy green bits. When the cumin seeds begin to pop, reduce the heat to a low setting and add the leek to the pan and stir fry for five minutes.
Add the red chilli flakes, celery, garlic chives and chopped radish and cauliflower leaves to the leek and cook until the the leaves start to wilt. Stir in the chickpeas and the aquafaba and cook until most of the liquid is absorbed and you have a fairly thick sauce.
Bring a large pan of water to the boil. Put the noodles in the pan and leave for 2-3 minutes to warm them through. Arrange on a plate and pour the sauce on top and serve.
It’s time for a bit more armchair culinary tourism and we’re off to Genoa in northern Italy, birthplace of the farinata, a chickpea flour pancake that is a popular snack along the coast of the Ligurian Sea, where it’s known as fainâ, and down into France’s Côte d’Azur, where it’s known as socca.
Farinata with Saag Aloo Gobi
With Diwali, the Festival of Lights celebrated by Hindus, coming up on 14 November this year, we decided to mark the occasion by topping our chickpea pancake with a dry, spicy Indian inspired combination of spinach, potato and roasted cauliflower.
Prepare the farinata batter
Pancake puffing up
Toss it over to finish it off
Serve with the topping of your choice
These chickpea pancakes are usually baked in the oven but we didn’t have a suitable baking dish so we tracked down a recipe at Electric Blue Food for a pan–fried version. We replaced the water with aquafaba – the leftover liquid from cooking beans – to give the pancake a bit more oomph. This pancake proved really easy to cook compared with traditional ones made from flour, milk and eggs.
Farinata is often eaten plain with just a sprinkling of black pepper and rosemary, but it can also be served with other, more substantial, toppings. The taste of this chickpea pancake reminded us of a thicker version of southern India’s dosa, a much missed treat since the start of the pandemic. So we decided to top it with spicy vegetables to attempt an approximation of our favourite pancake.
Ingredients (serves 4)
For the farinata:
200 g chickpea flour
100 ml olive oil
300 ml aquafaba
For the Saag Aloo Gobi topping:
250 g spinach
250 g cauliflower
250 g potato
One onion
One teaspoon cumin seeds
One teaspoon coriander seeds
One teaspoon chilli powder
One teaspoon cinnamon
One teaspoon turmeric
50 ml olive oil
Method
For the farinata:
Use a wooden spoon to mix the chickpea flour with the oil in a large bowl and then slowly add the aquafaba and switch to a hand whisk and blend until smooth (you can use a blender or a stick blender for this).
Leave to stand for 30 minutes. Heat a few drops of oil in a large frying pan (around 30 cm in diameter) and then pour in a quarter of the pancake batter. Swirl it around to distribute the batter evenly.
The pancake will start to puff up – when this happens, slide a spatula underneath and turn it over and cook on the other side until it slides off the pan easily. Put on a plate and keep in a pre-heated oven (100 c) until ready to serve.
For the Saag Aloo Gobi:
Break the cauliflower into florets, drizzle with olive oil and bake in the oven at 180 c for 30 minutes or until they start to char slightly.
Slice the potatoes into four or eight pieces depending on how big they are. Put in boiling, salted water and cook for five minutes. Drain and put in cold water.
Heat the oil in a heavy based pan and then add the cumin seeds. When they start to sizzle, add the chopped onion. Add the rest of the spices and stir well. After five minutes or so, add the potato and stir fry for five minutes.
Now put the chopped spinach on top of the potatoes and add a few of teaspoons water. Cook until the spinach begins to wilt. Stir in the baked cauliflower and serve immediately on top of a farinata.
This time round on KCC we’re returning to mücver, Turkey’s versatile courgette fritter, with our take on that brunch staple Hash Browns. This mücver variation adds potato and garlic scapes to the mix to give us a fritter we’ve dubbed Hash Greens.
Hash Greens – a mücver variation
These fritters are super-easy to prepare and cook and are great as part of a breakfast or brunch. They can also be served in a roll to make it closer to a veggie burger.
Garlic scapes – a long internode that forms the basal part or the whole of a peduncle
We came across garlic scapes, the edible stem that grows from the bulb, on a recent visit to the local greengrocer while looking for green beans. This flavoursome peduncle gives a milder garlicky kick to soups, pestos and stir fries. It’s not an overpowering flavour as it adds a subtler, roasted garlic undernote to these dishes.
Ingredients (Makes 6-8 fritters)
One medium courgette (zucchini) (approx 200 g)
One medium potato (approx 200 g)
One small onion (approx 100 g)
50 g garlic scapes
100 g chickpea flour
25 g mixed fresh herbs
One teaspoon cumin seeds
One teaspoon chilli flakes
One teaspoon turmeric
One teaspoon black pepper
50 ml olive oil
Method
Grate the potato and courgette and mix together in a large bowl. Finely chop the garlic scapes and add to the bowl. Stir in the chickpea flour and add the herbs (use and fresh herbs you have e.g. parsley, coriander, mint) and spices and mix well so you have a smooth that’s neither too dry and crumbly nor too wet and sloppy.
Heat the oil in a frying pan. Form the mix into golf-ball sized patties and then put in the pan and flatten with a fish slice or spatula. Fry until golden-brown on both sides. Serve as part of a breakfast or brunch or in a bun as a burger with toppings of your choice.
This time round on Knidos Cookery Club we’ll be taking an armchair culinary tour to the Middle East and looking at the origins of the humble falafel. Arguments abound as to where this street snack par excellence originated, but most likely it was Egypt according to the evidence.
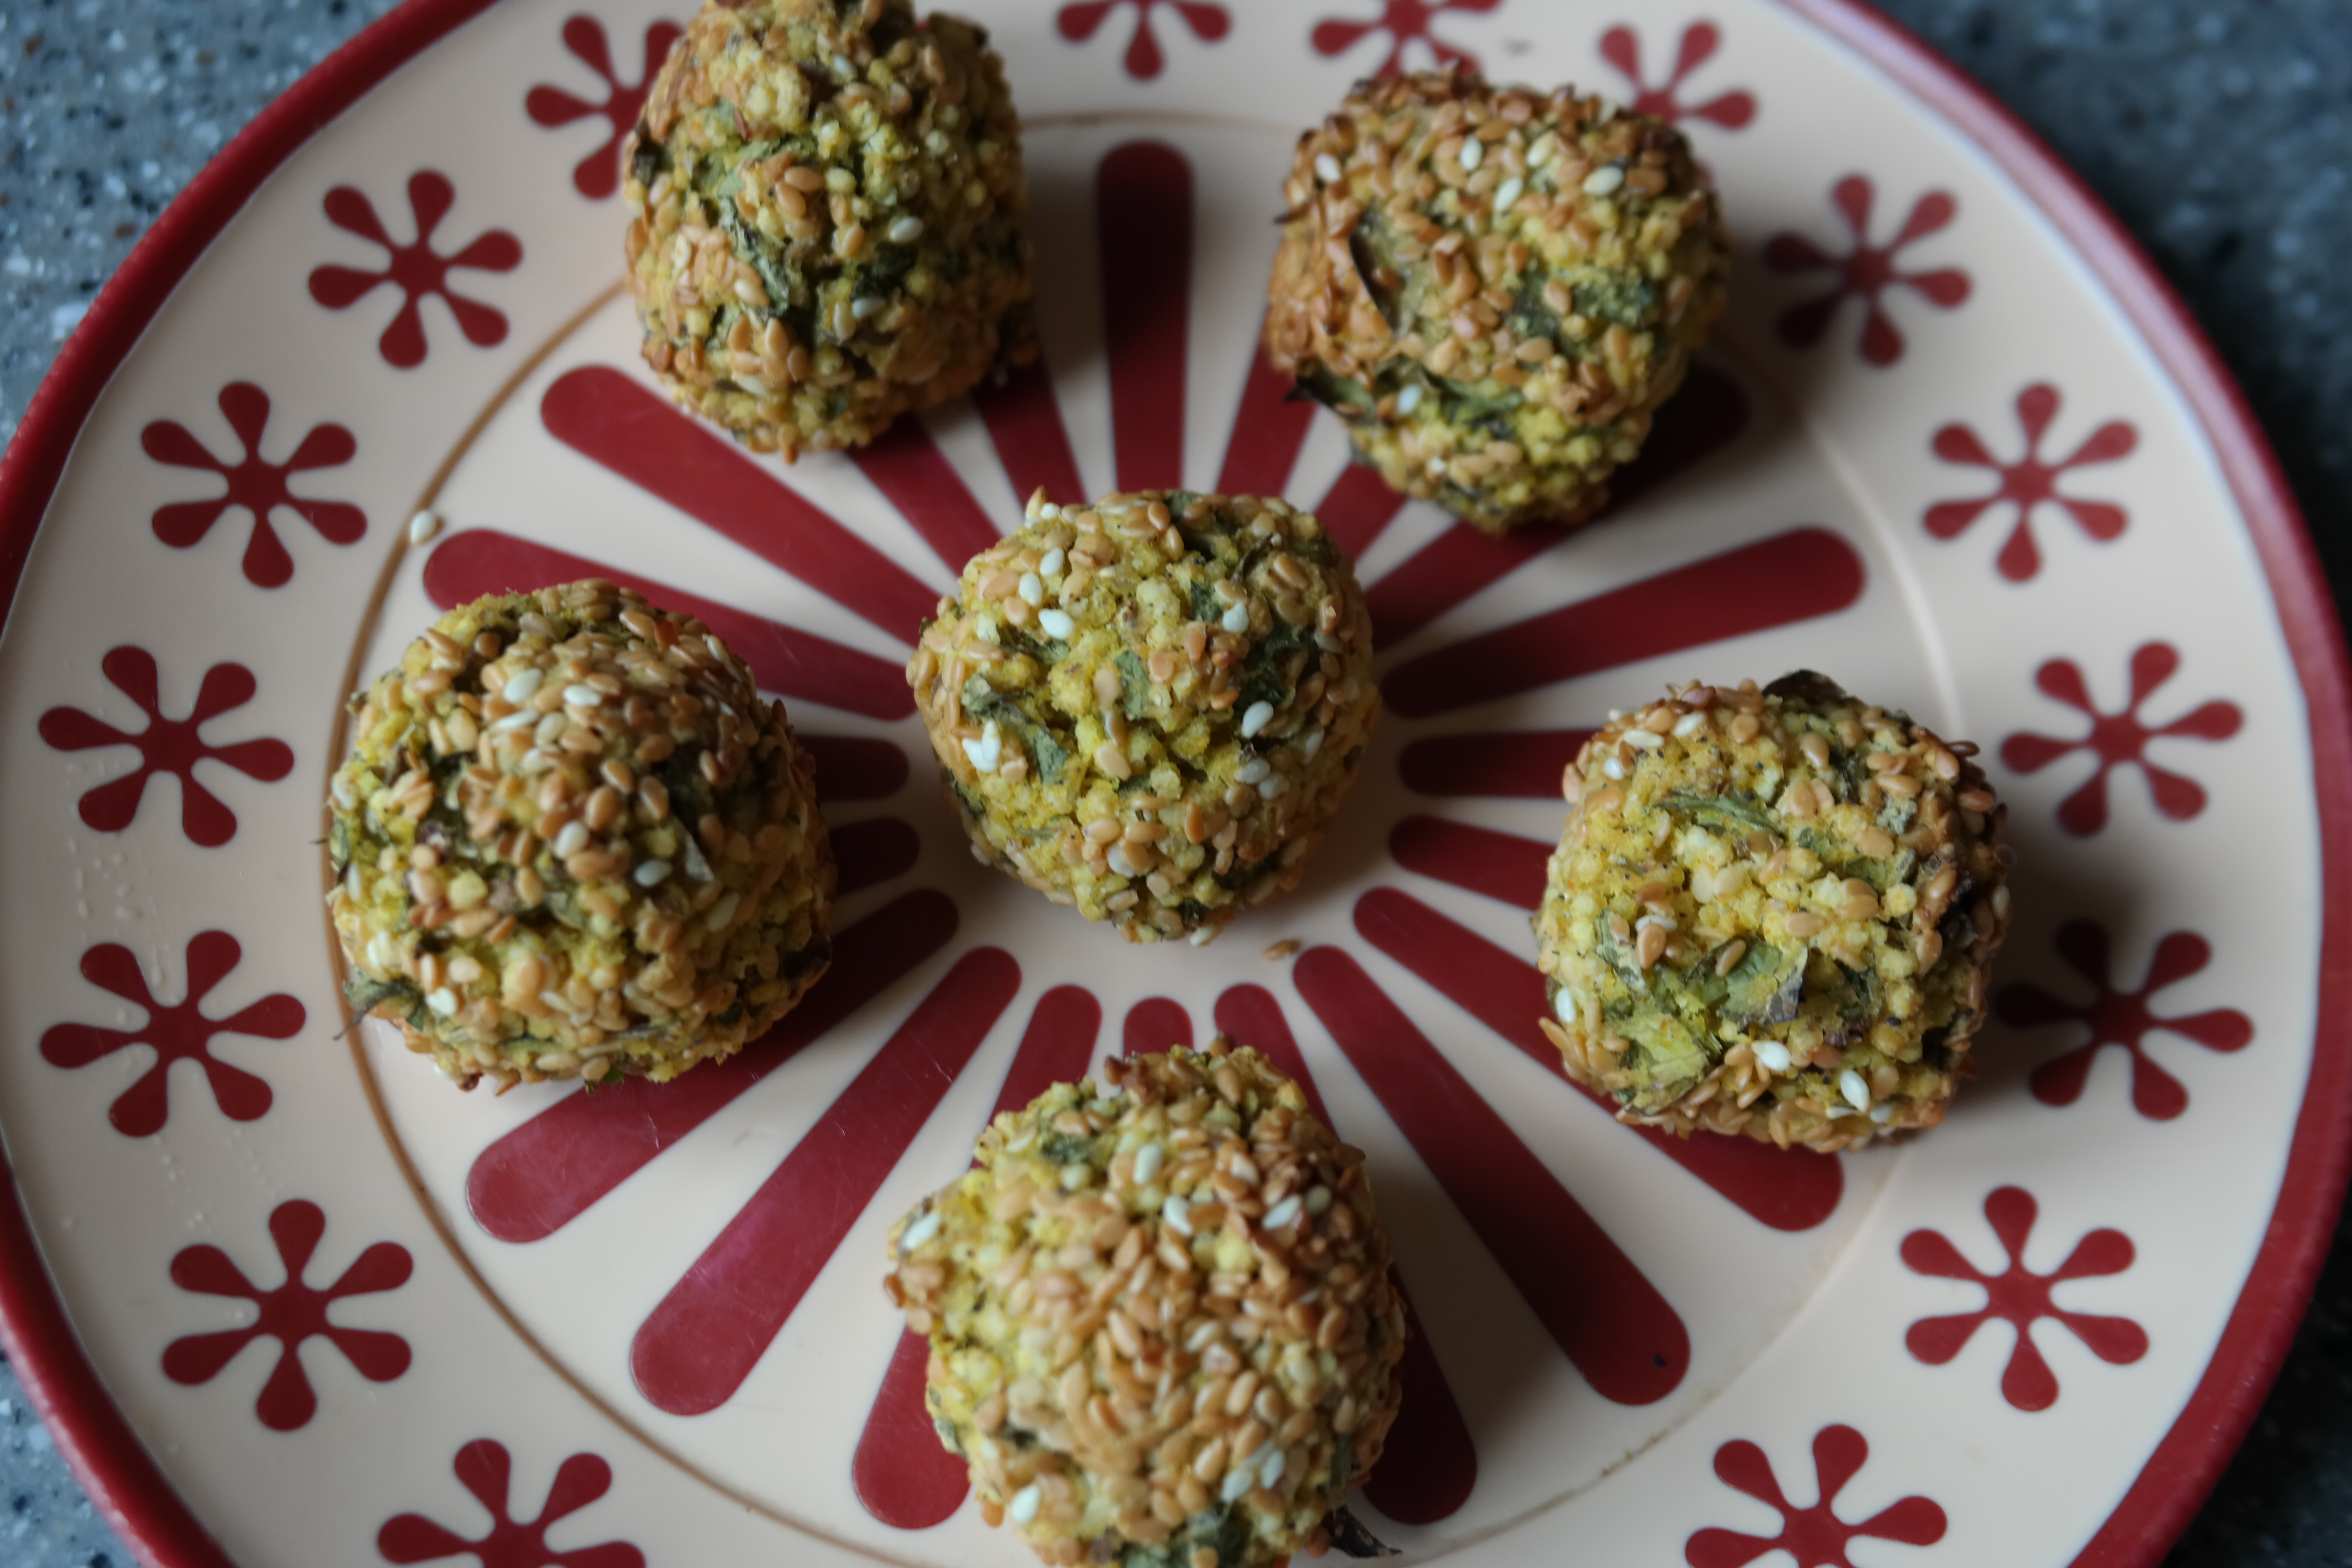
Millet falafel, anyone?
The Egyptian version of this tasty bite is usually made with fava beans, known as fūl in Arabic, which is thought to be the base for the name falafel , whilst in other parts of the Mediterranean region chickpeas are preferred.
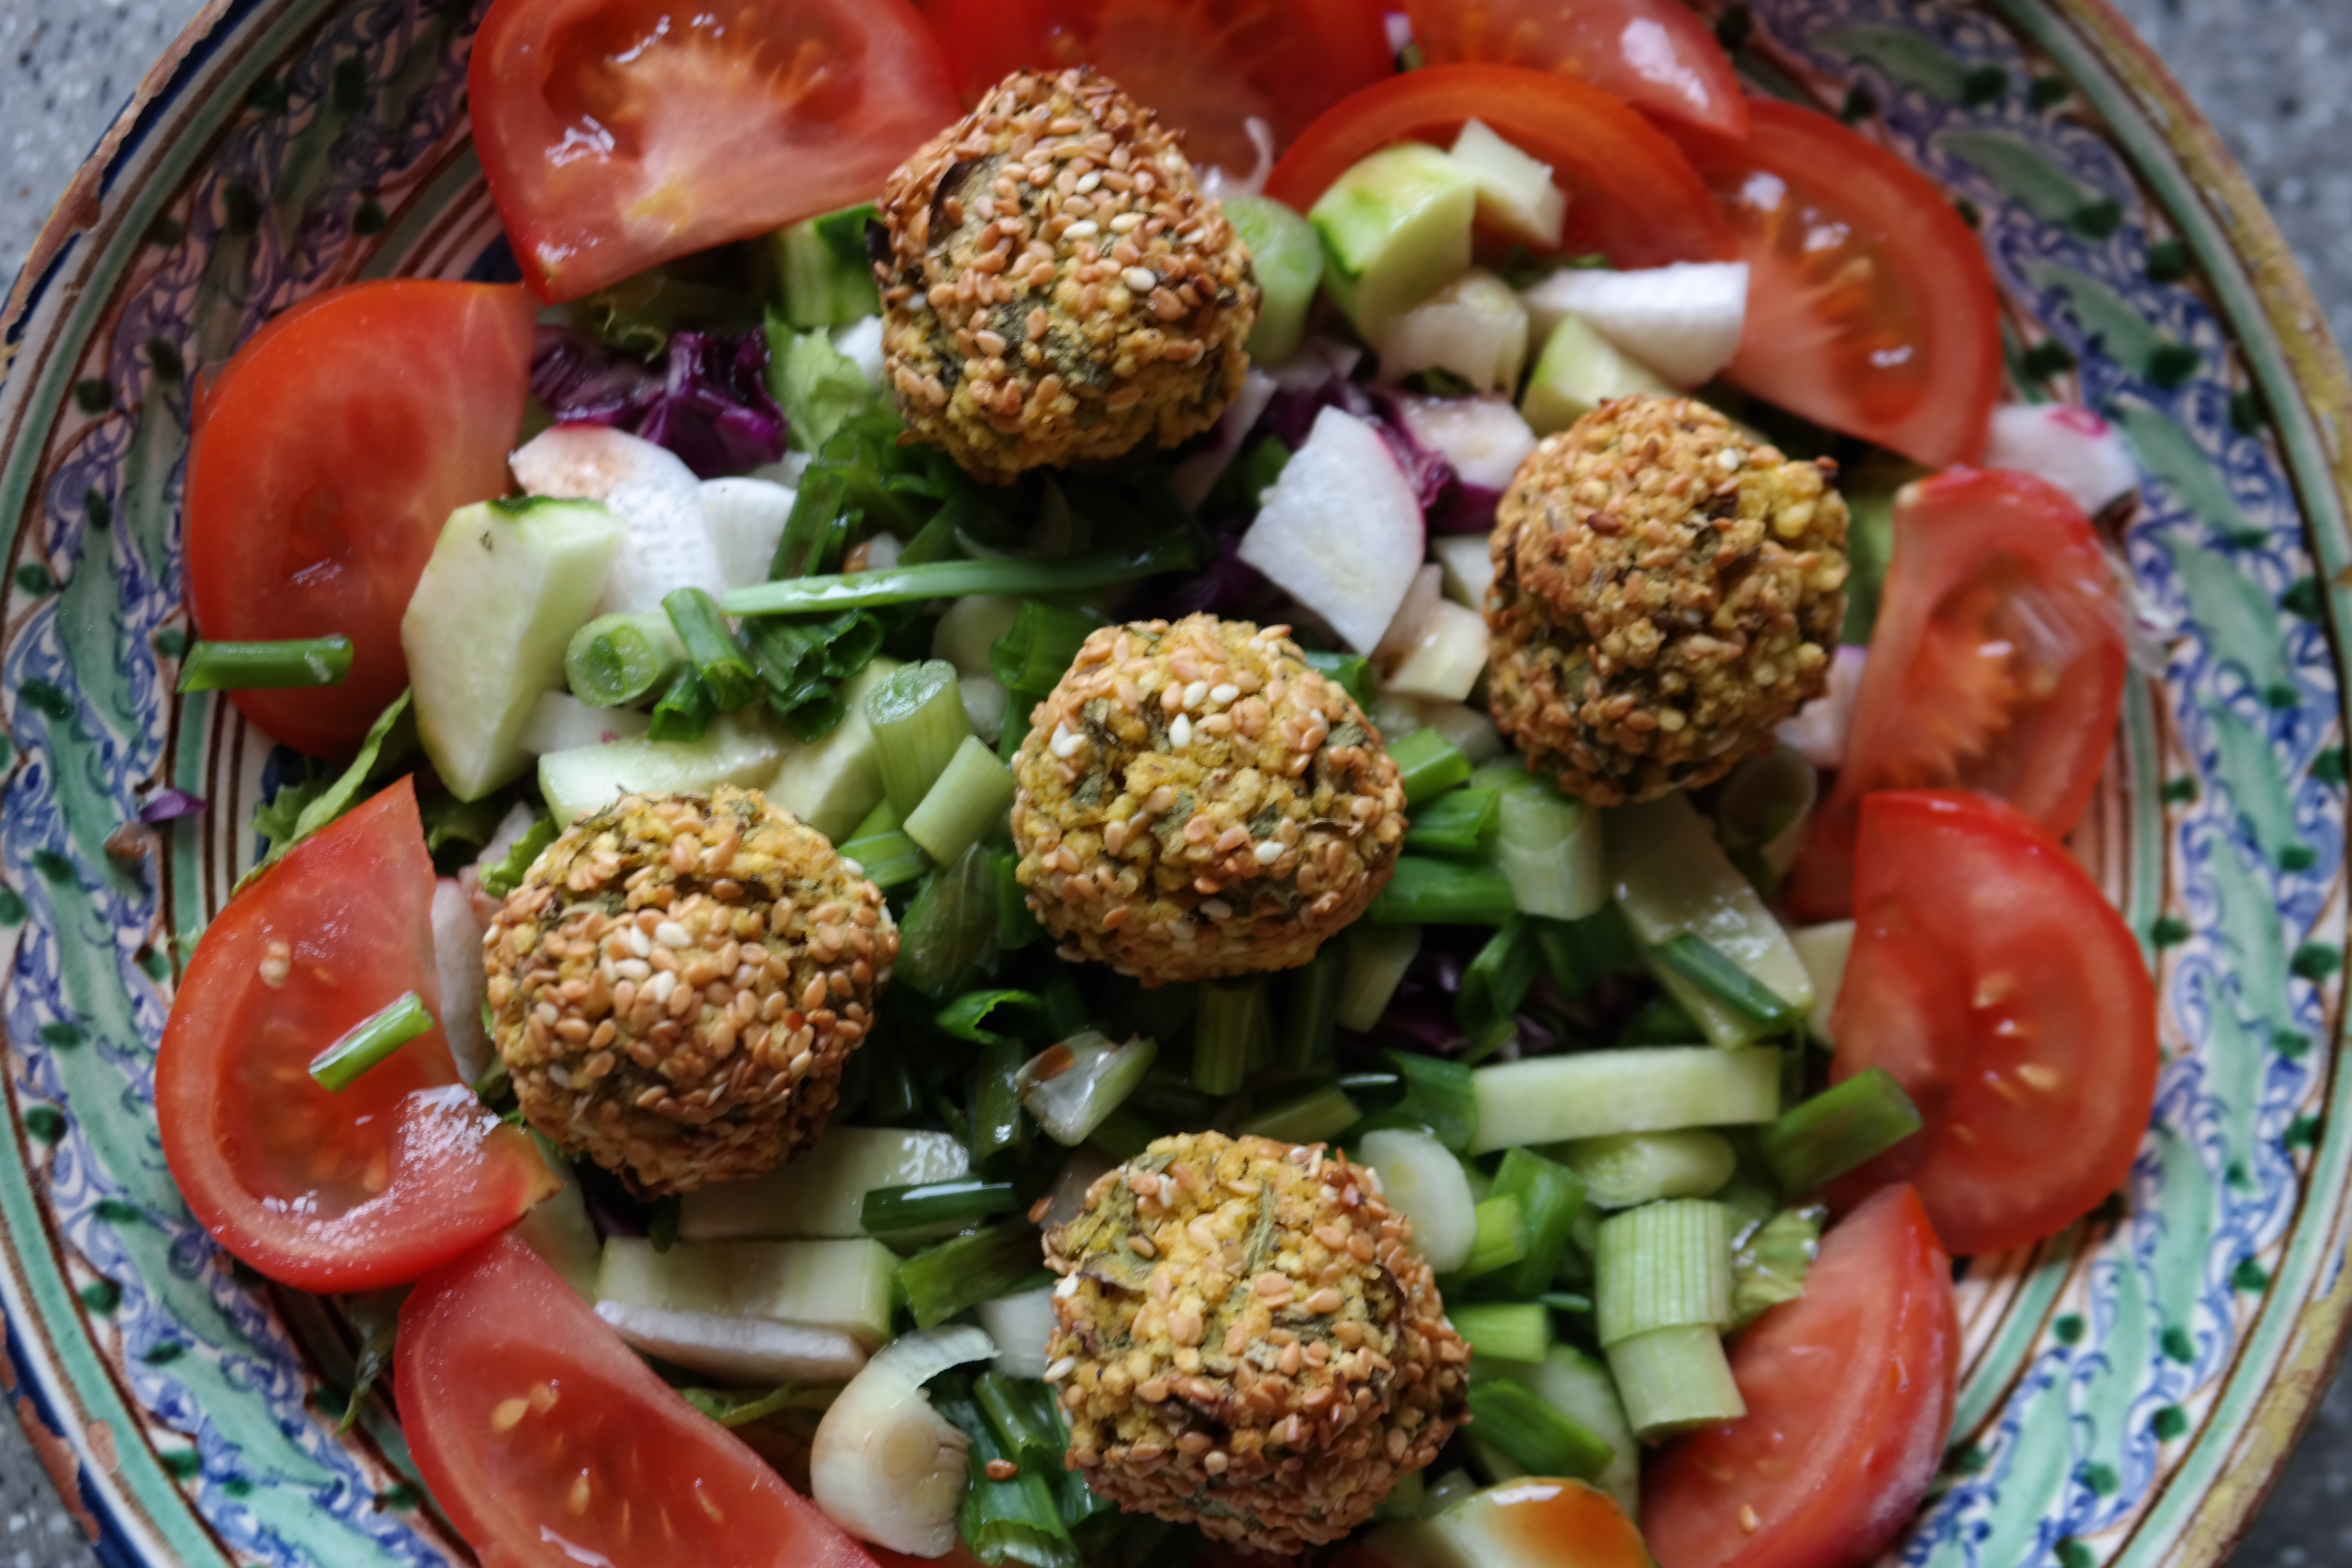
Falafel salad
With both chickpeas and fava beans in short supply in Almaty at the moment, it was back to the drawing board to look for an alternative base for our falafel. While stocking up during lockdown in our local shop we came across a pack of millet and a spot of googling revealed that this would work just fine as the base for our take on the falafel.
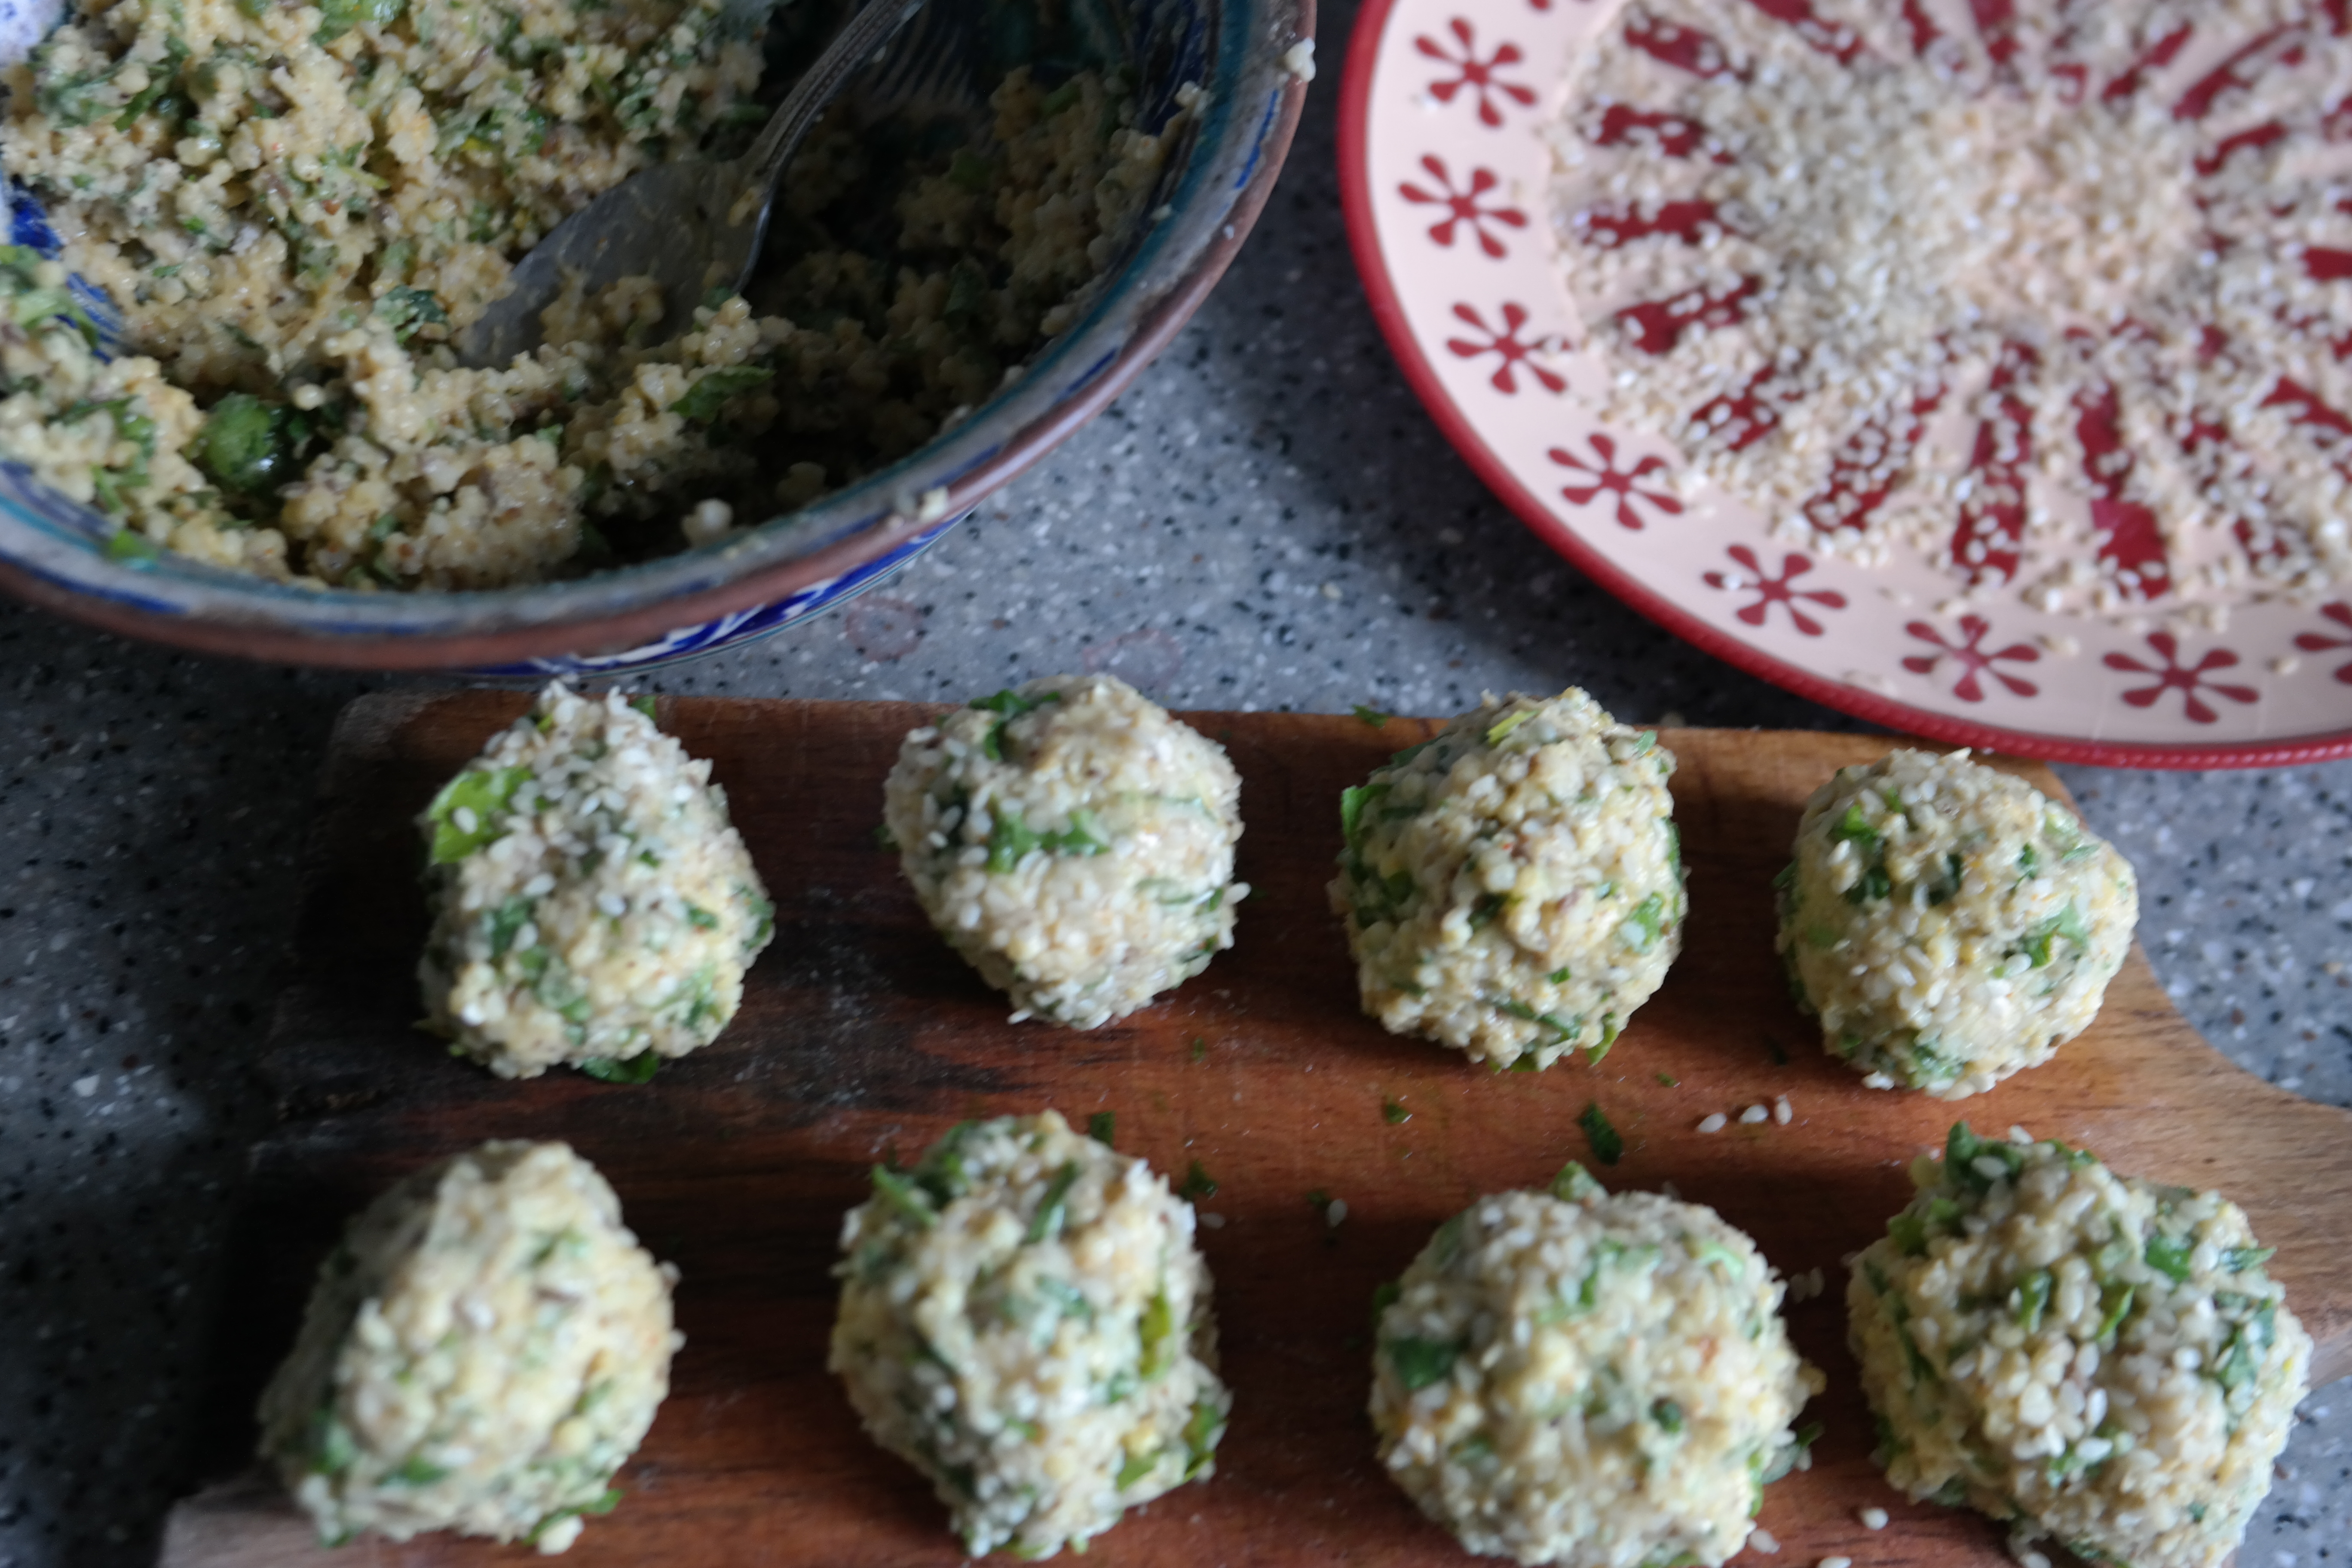
Forming the falafel
We baked them in the oven rather than deep-fried them as it’s a lot less hassle. Be sure to use plenty of parsley, cumin, coriander and chilli powder to spice up the millet. The resulting falafel were crisp on the outside but soft and fluffy in the centre, just as they should be.
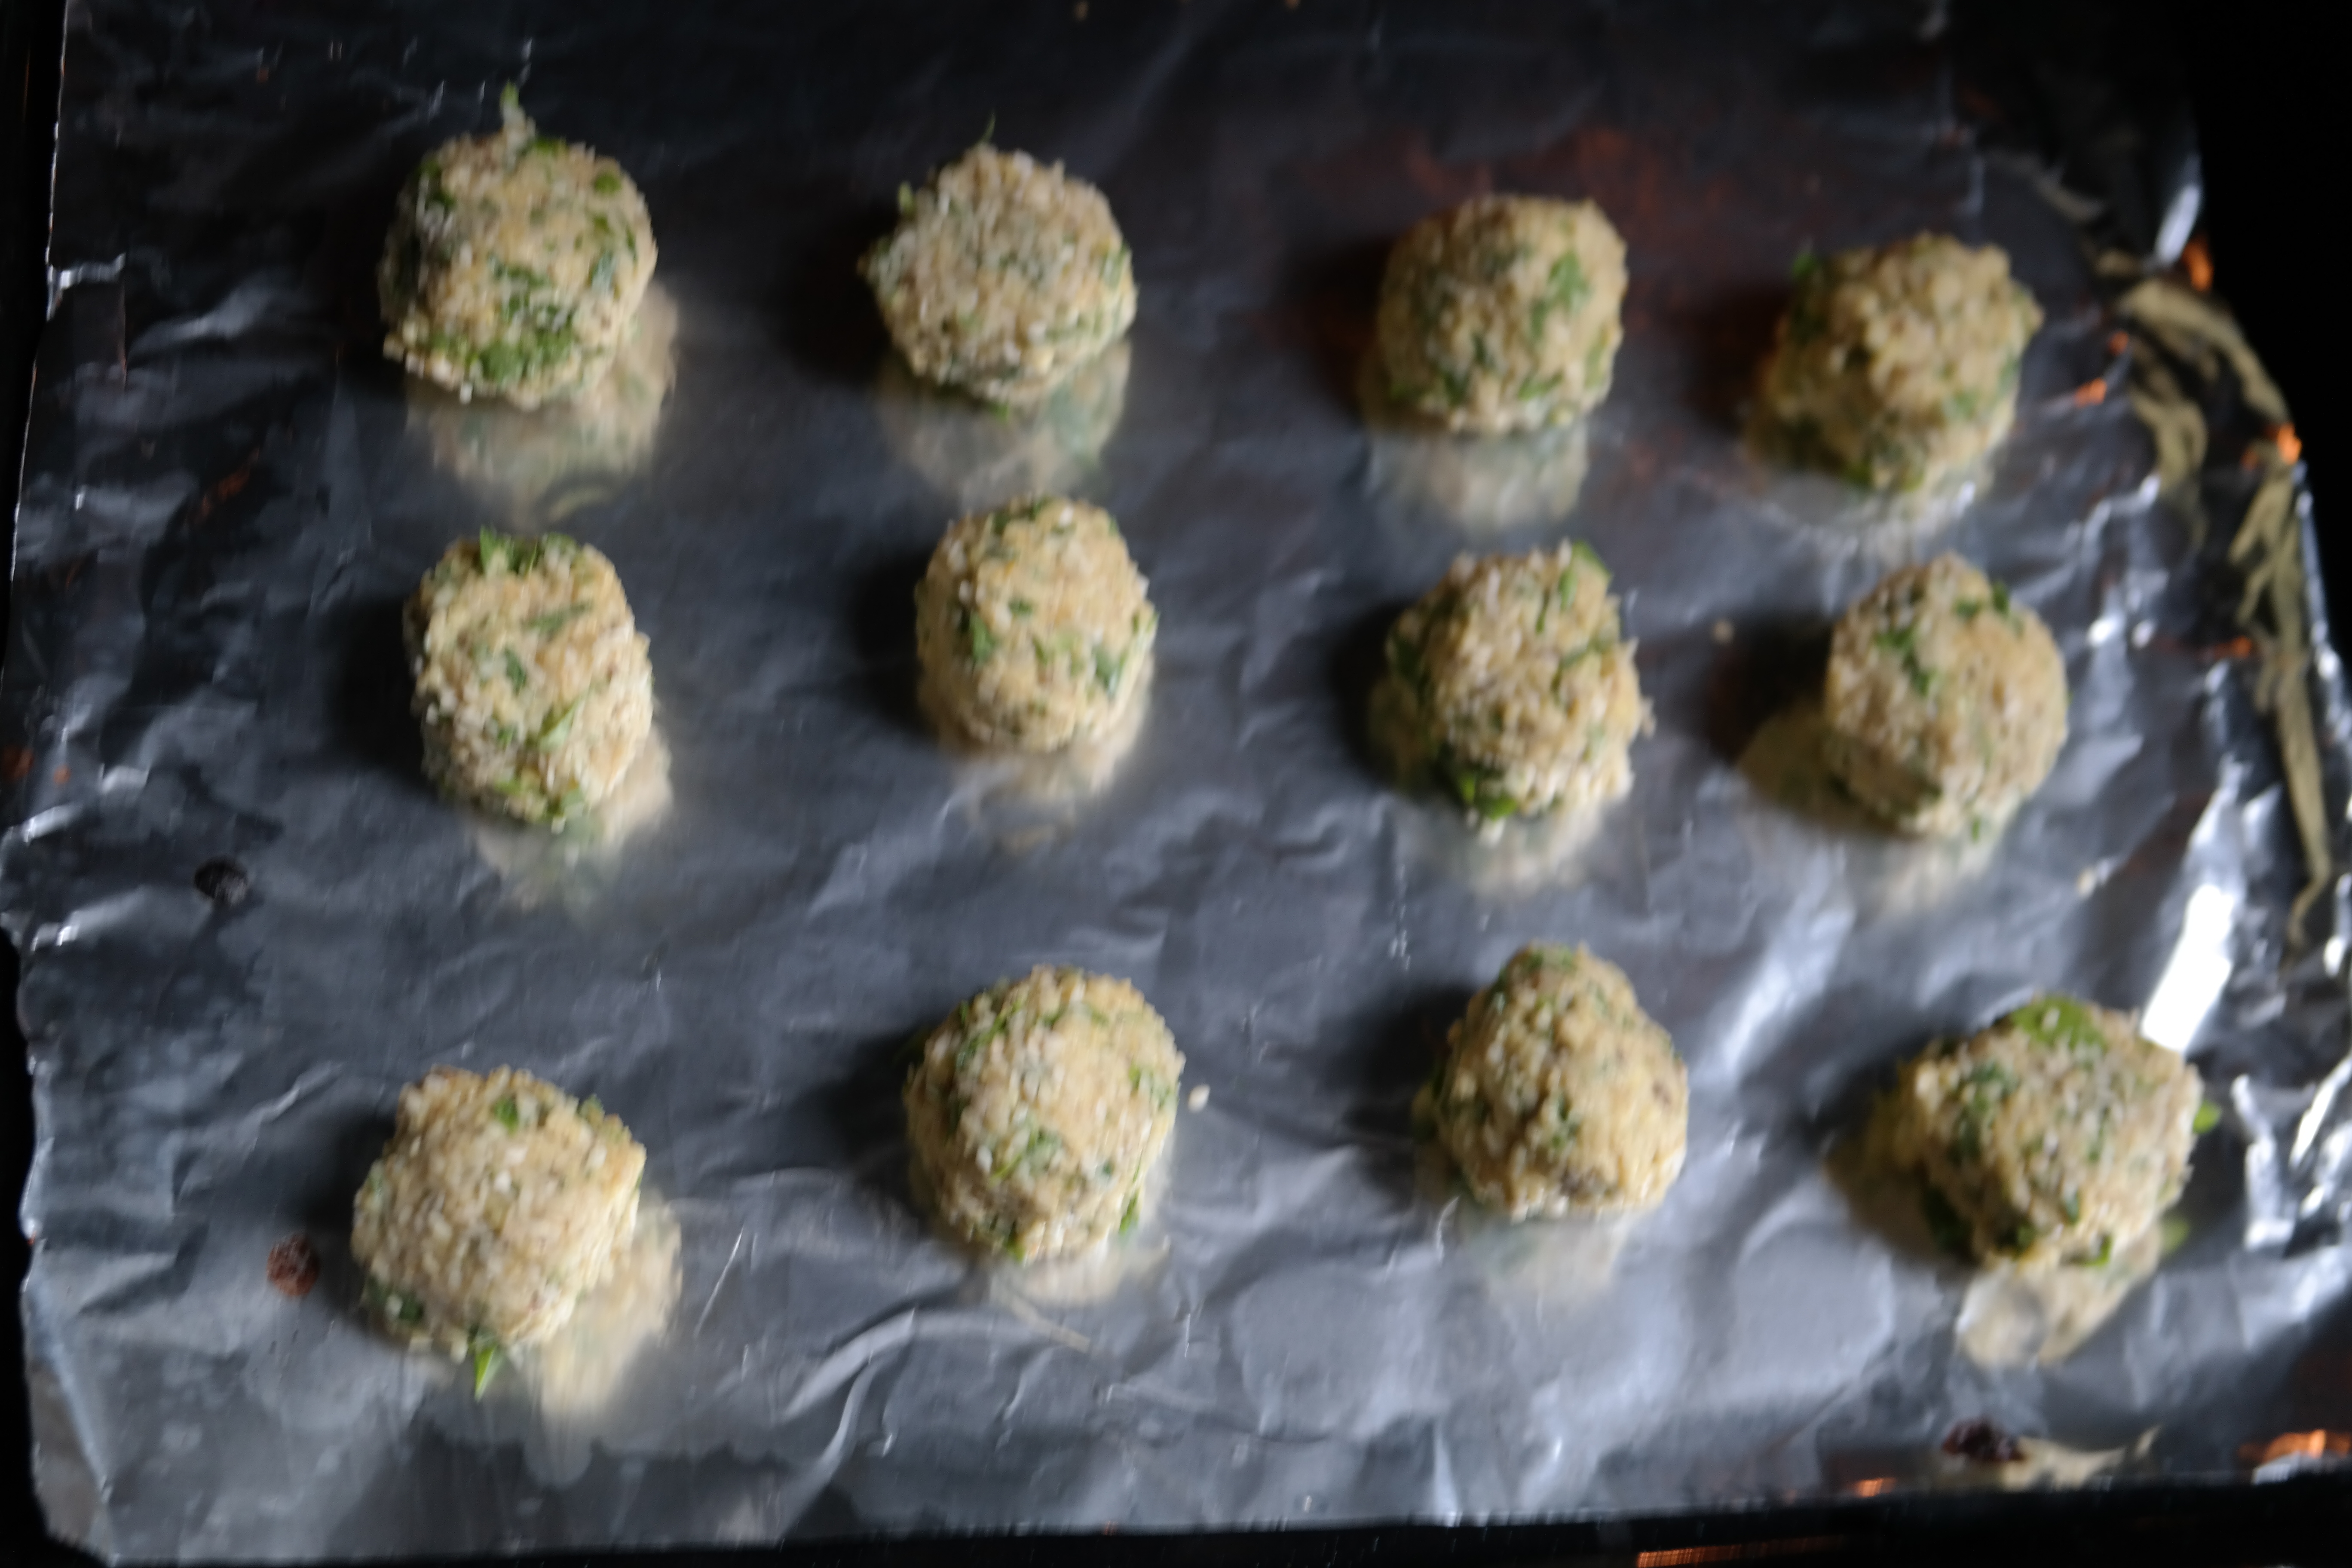
Bake the falafel in the oven
Be careful when cooking millet as it has a tendency to stick to the pan if you don’t keep an eye on it and stir regularly. We found it best to rinse and soak it for a few hours before cooking as this reduces the time needed to cook it.
Ingredients (makes 12-16 falafel)
150 g millet
300 ml water or vegetable stock
one garlic clove
one bunch of parsley
one teaspoon cumin
one teaspoon coriander
one teaspoon chilli powder
Sesame seeds to coat the falafel
Method
Rinse and then soak the millet in a pan for four hours. Drain the millet and cover with water or vegetable stock. Bring to a boil and then simmer until the liquid is absorbed. Stir regularly as the millet will stick to the bottom of the pan if not watched carefully.
Finely chop the parsley, both leaves and stalks, mince the garlic clove and add to the cooked millet. Add the spices – if you want to give your falafel more oomph, double the amount. Mix well and then form into balls. Roll the balls in the sesame seeds and then place on a tray and oven bake for 20 minutes at 200 c, or until the falafel turn a golden-brown colour.
Serve in pita bread with salad and sauces of your choice or as part of a salad – we made one from cucumber, tomato, spring onion, celery, red cabbage and radish. These falafel will keep in the fridge for a few days so you can cook a large batch at the same time.
With movement getting ever more restricted in the lockdown — we’re now limited to not going more than 500 m from our flat in Almaty, which rules out big supermarkets for shopping trips, maintaining a supply of fresh ingredients is becoming more tricky – so this is the time when beansprouts come into their own…
This slideshow requires JavaScript.
So, this time round we’ll be looking at some things you can do in the home, such as sprouting beans and lentils, to add a fresh, nutritious kick to your salads and stir-fries. We’ve gone for mung beans which are easy to sprout – your first crop will be ready in a matter of days and all you need is a glass jar and some mesh netting (we re-purposed a yoga mat bag by recycling the nylon mesh for our sprouter).
KCC’s sprout-powered salad with carrot, chickpeas, spring onions and radish.
Here are the steps for germinating mung beans:
Select clean, undamaged mung beans and wash them thoroughly.
Sterilise your glass jar and mesh lid with boiling water and/or in a hot oven.
Fill the jar about a quarter of the way with washed beans.
Soak the beans in cold water in the jar for at least four hours.
Drain off all the water and put the jar in a cool, dark cupboard.
Rinse the mung beans a few times a day with cold water and drain the liquid off.
After two or three days, your first crop will be ready for eating.
When the sprouts are around 2-3 cm long, put them in the fridge until using.
Warning: Raw bean sprouts can lead to food poisoning if not prepared in sterile conditions and regularly washed with clean water.
If the sprouts look slimy or smell strange, throw them away.
Once sprouted, store the sprouts in the fridge and try to use them as quickly as possible.
And don’t forget to wash your hands frequently, especially when preparing food.
This week’s offering – a soup made from chickpeas and carrots, was inspired by a recent visit to a funky Central Asian restaurant called Saksaul in Nur-Sultan, Kazakhstan. This soup appeared on the menu, but unfortunately there wasn’t any left that day. Spotting yellow carrots on sale in the market after returning home, we decided to cook up our own version.
KCC’s Golden Soup of Samarkand featuring yellow carrots and chickpeas
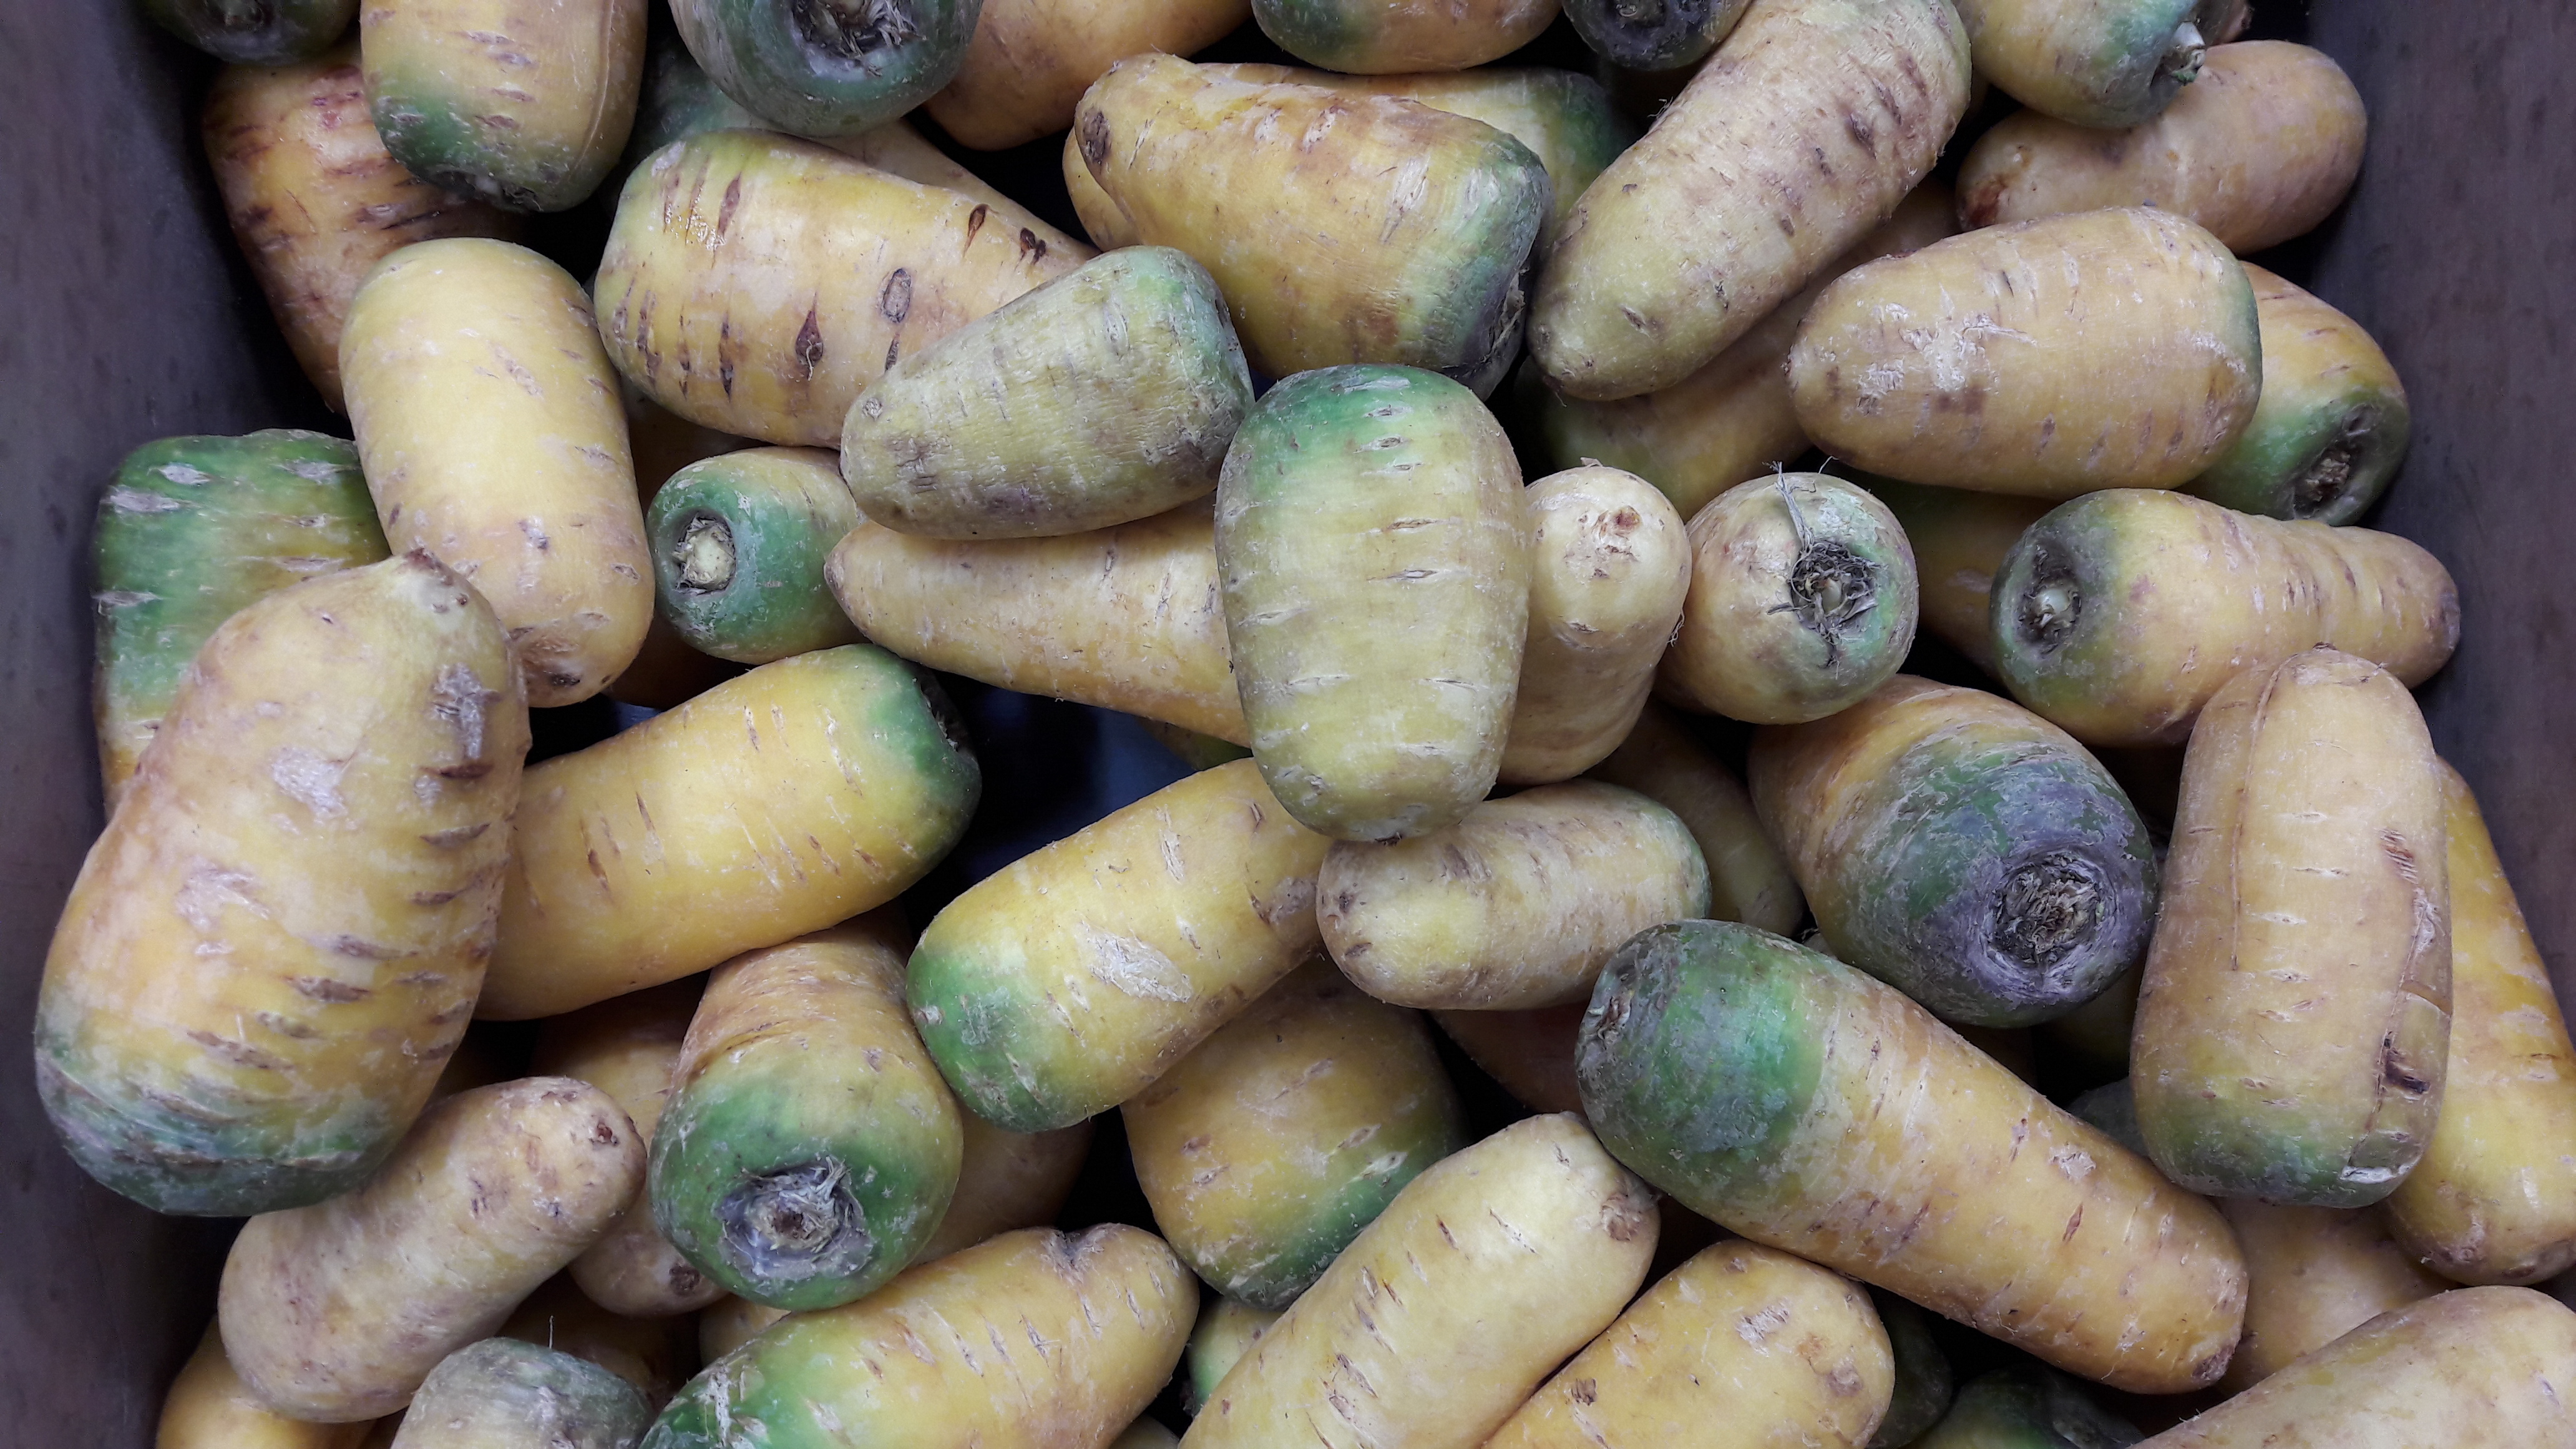
Our soup contains two ingredients that are common in the cookery of Samarkand in Uzbekistan – chickpeas and yellow carrots. Not all carrots are orange in Central Asia, you can even find black ones on occasion, but we find these yellow ones particularly sweet and tasty.
Yellow (and a bit green!) carrots on sale in Kazakhstan
This famed Silk Road city of Samarkand provided further inspiration for our golden potage with spices such as cumin, coriander and turmeric that are still bought and sold along this ancient trade route.
Ingredients (makes 4 portions)
500 g yellow carrots
500 g chickpeas
Two yellow onions
Two garlic cloves
Two teaspoons mustard seeds
Two teaspoons chilli powder
Two teaspoons cumin seeds
Two teaspoons coriander seeds
Two teaspoons turmeric
50 ml vegetable oil
One litre vegetable stock
Method
Heat the oil in a heavy-based pan and add the mustard seeds. When the seeds begin to pop, add the chopped onion and garlic and cook over a medium heat for five minutes. Add the other spices and mix well.
Next add the diced carrot and stir to coat the carrot with the mix. Cook for five more minutes, stirring occasionally. Add the chickpeas and stir well, then add the stock and reduce to a low heat and simmer the soup for 30 minutes or so.
Using a stick blender, liquidise the soup. Pour into bowls and garnish with chickpeas and a sprinkling of cumin seeds. Serve with bread – we used a flatbread but any crusty bread will work just as well.
Over the last few days, we’ve been experimenting with perfecting a batter to make pakora – a deep-fried snack from the Indian sub-continent. After testing a few recipes we’ve hit on a formula that can be used to coat a variety of vegetables from cauliflowers to carrots, parsnips to peas, and also cheese!
Halloumi pakora with potato wedges and peas
While on a recent visit to the UK, we came across battered halloumi on many menus – the squeaky cheese from Cyprus that stays firm when cooked. We’ve discovered that it makes a perfect partner for our pakora batter when deep-fried. We recommend you try it with this spicy Yemini sauce, zhug.
But you’ll need to be quick, as halloumi has been a victim of its own success. Severe global shortages of this versatile cheese are predicted as demand far outstrips supply. Luckily for us here in Kazakhstan, a local producer has started making a version of this cheese. We’re pleased to report that it tastes pretty good, so for now the crisis has been averted in our winter base.
Ingredients (makes enough batter for a sliced up 250 g block of halloumi)
100 g chickpea flour (also known as gram flour or besan)
One small onion
1 cm knob of ginger
One garlic clove
One teaspoon red chilli flakes
One tablespoon of fresh coriander
50-100 ml cold water
Method
Mix all the ingredients together with a fork or a whisk, adding water until you get a smooth consistency that is neither too runny not too thick with no lumps. Cover the batter with clingfilm and let it stand for an hour or so before using.
Heat a litre of cooking oil, we used sunflower oil but any will do, in a heavy-based pan over a medium heat until it reaches 180 c. To test the temperature, dip a chopstick or the handle of a wooden spoon in the oil – if the oil starts to bubble vigorously, then it is at the right temperature.
Slice a 250 g block of halloumi into eight pieces. Coat the halloumi slices in the pakora batter and drop into the oil. When the pakora rise to the surface and are a golden-brown colour, remove with a slotted metal spoon and drain on kitchen towel.
Serve hot with potato wedges or roast potatoes and minted peas. The pakora goes well with a coriander and coconut chutney – this site has a good recipe for this sauce, or with our zhugsauce.