Grassy Green Samosas

19 September 2019

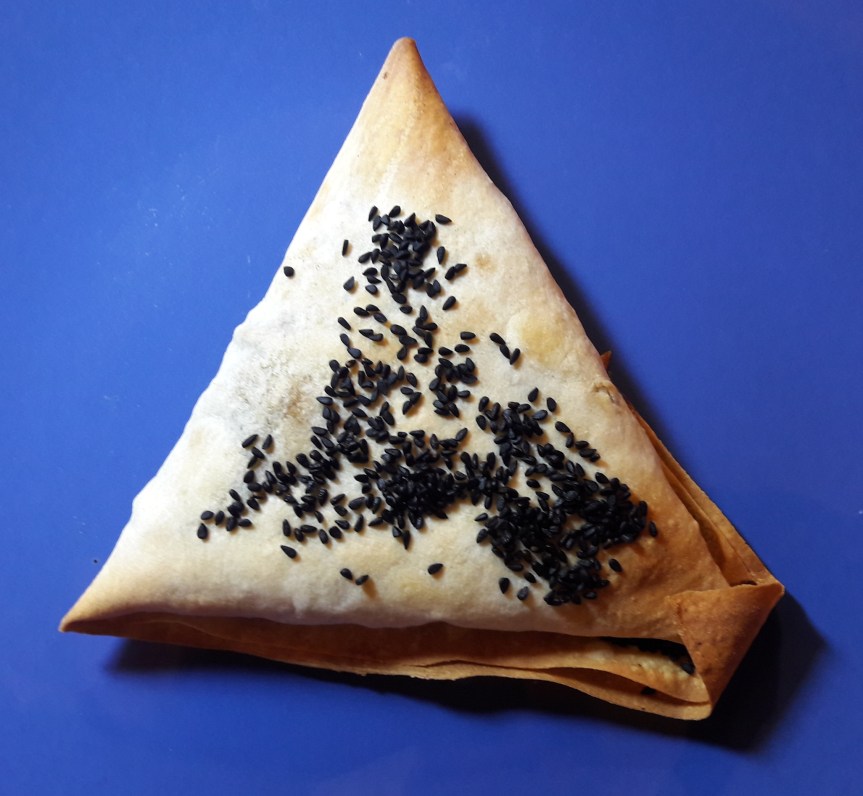
This time round we’ve filled some filo pastry triangles with some fresh leafy greens. Inspired by Central Asia’s kok samsa, a small, deep-fried pie filled stuffed with chopped up greens, our take on this popular street snack mixes some peppery radish leaves with some tart sorrel-like leaves, leek and carrot.

20190917_121523.jpg
A grassy, leafy green samosa

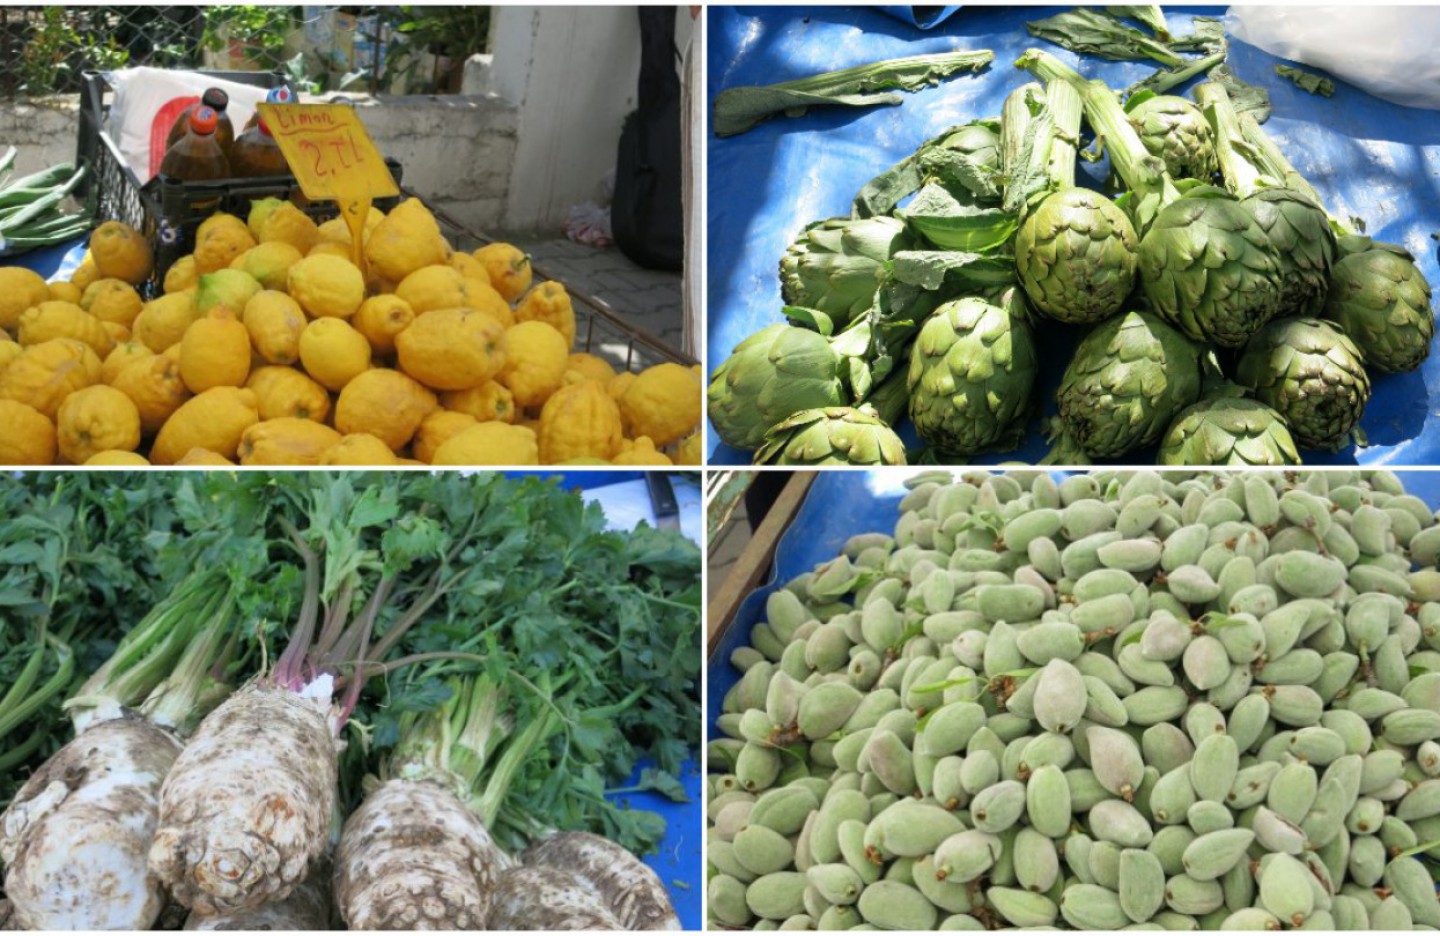
A few weeks ago, we left Datça’s weekly market laden down with a selection of leafy greens – called ot (grass) in Turkish, including a bunch of radishes complete with leaves and an unidentified bunch of greens with a tart, lemony taste.

Further inspired by Turkey’s otlu pide and otlu börek, we chopped up a leek and fried it in olive oil and then mixed in some grated carrot before adding the leafy greens and spices. To make these pies you can use any leafy greens – Swiss chard and spinach also work well here.

Then we wrapped the filling in filo pastry, which can be bought from your local supermarket or Middle Eastern grocery shop – or you can try and make your own – here’s some tips on how to do it.

Ingredients (makes 6-8 samosas)

  • 12 sheets of filo pastry (approx 15 cm x 15 cm)
  • One leek
  • One carrot
  • One bunch each of sorrel and  radish leaves (use spinach and/or Swiss chard if you can’t find these)
  • 50 ml olive oil
  • One teaspoon dried thyme
  • One teaspoon sumac
  • One teaspoon cumin
  • Sprinkling of nigella seeds

Method 

  1. To make the filling, heat 25 ml olive oil in a heavy-based pan and cook the chopped leek over a medium heat until translucent. Add the grated carrot and cook for five minutes, stirring regularly. Add the herbs and spices and the roughly chopped greens and cook until the leaves are wilting.
  2. Place a layer of filo pastry on a flat surface dusted with flour. Brush with olive oil and add another sheet, brush with oil and then add one more layer. Cut the layers of filo into two triangles along the diagonal.
  3. Place a generous dollop of the filling in the middle of each triangle. Fold the edges of pastry over, brushing with more oil, to create a triangle-shaped pie like a samosa. Repeat the process until all the filling is used up.
  4. Place the pies on a greased baking tray and brush with more oil and sprinkle nigella seeds over them. Place the tray into a pre-heated oven and bake at 200 °C  (gas mark 6) for 30 minutes or until the pies are golden brown in colour. Serve straight away with a salad of your choice.

The Turk-Mex Chronicles: Corny Courgette Fritters (aka Return of the Mücver Variations)

3 October 2019

This time round on Knidos Cookery Club we’re adding to the recipe bank of our Turk-Mex influenced cuisine. We’ve taken a Turkish favourite, mücver, a fritter made from grated courgettes, and added a Mexican staple, corn, to create our latest mücver variation.

20190927_224339

It’s believed that corn was first domesticated in southernMexico around 9-10,000 years ago. From there it slowly spread across the Americas before finding its way into Europe in the 16th century; brought back by the explorers who had landed in what became dubbed ‘The New World’.

These tasty fritters can be served like a burger in a bun, wrapped in a tortilla, stuffed into a pita bread or just plain with a jacket potato and some salad for a healthy snack that can be eaten at any time of the day.

Ingredients (makes around 8 large fritters)

  • Two courgettes
  • One corn cob
  • Three tablespoons wholemeal flour
  • 75 ml olive oil
  • Two teaspoons cumin
  • Two teaspoons red chilli flakes
  • Two teaspoons dried thyme
  • One teaspoon turmeric

Method

  • Bring a pan of water to boiling and then switch off the heat. Soak the corn cob in the boiled water for five minutes and then put in a pan of cold water. Remove the kernels by slicing downwards with a knife on the sides of the cob.
  • Grate the courgettes into a large bowl and mix with the flour, herbs and spices, reserving 25 ml of the olive oil for cooking. Add the corn kernels and mix well. Leave the mix to stand for a few hours in the fridge.
  • Heat the remaining olive oil in a frying pan. Take a golf ball sized scoop of the mix and put it into the pan and flatten it with a spatula. Cook over a medium heat for five minutes and then flip over and cook for another five minutes. Alternatively, you can bake the fritters in the oven for 30 minutes at 180c or grill on a barbecue.


Hummus to the Power of Turmeric

30th May 2019

Welcome back to Knidos Cookery Club, or KCC to those in the know. This time we’ll be whipping up some hummus spiked with the super-spice turmeric – it’s easier than you think and once you’ve tasted homemade hummus we’ll be surprised if you settle for a shop bought one again.

20190524_172344(0)
Turmeric-infused hummus all ready to go with carrot and cucumber slices

There are a lot of claims around the eastern end of the  Mediterranean Sea as to where hummus originated, but  ownership of this dip has now become truly international – we first came across this turmeric-infused version in Mexico earlier this year.

You’ll need some tahini (sesame seed paste) to make this recipe, but don’t worry if you can’t track any down – it’s simple to prepare your own batch of this nutty-tasting spread. Toast 50 g of sesame seeds in a frying pan (without oil) over a low heat and shake continuously until they turn from white to a golden colour. Then mix with 50 ml of olive oil in a blender and, hey presto, you have tahini. Add more oil for a runnier consistency.

Ingredients (makes around 300 g)

  • 250 g cooked chickpeas
  • 1 garlic clove
  • 2 teaspoons tahini
  • 1 tablespoon olive oil
  • Juice of a lemon
  • 25 ml chickpea water
  • 1 teaspoon turmeric
  • 0.5 teaspoon cumin or caraway seeds
  • 1 teaspoon paprika or chilli powder

Method 

  • Place all the ingredients into a bowl, except for the paprika and cumin (or caraway) seeds. Mix with the blender setting or with a hand blender. Keep mixing until you have a creamy, smooth paste. If needed, add  more of the reserved chickpea water or lemon juice to achieve a smoother consistency.
  • Allow to chill in the fridge for a few hours then mix in the cumin (or caraway) seeds. Sprinkle the paprika over the top and serve with slices of cucumber and carrot.


Nauryz Spring Cleaning: Mung Bean Detox

14 March 2019

With another Nauryz, the spring equinox, just around the corner, we’re looking at this turning point of the year as a good place to start some spring cleaning for the body.

20190313_150439
The Mighty Mung Bean

You can detox your digestive system by utilising the mighty mung bean, considered by both traditional Chinese medicine and India’s Ayurvedic medicine as an effective aid to remove toxins from the body.

20190313_133931
Knidos Cookery Club’s Mung Bean Detox Soup

When combined with spices such as turmeric, cumin, ginger and black pepper, the mung bean can do a lot to help flush out unwanted material from your body.  While some practitioners recommend following a detox diet based on mung bean soup for 7-10 days to really cleanse yourself, it’s quite a powerful process so we’d recommend a bowl or two every week as being beneficial to your general well-being.

Ingredients (Makes 3-4 servings)

  • 200 g mung beans
  • One carrot
  • One courgette
  • One stick of celery
  • 1 litre water
  • Four tablespoons tomato paste
  • One teaspoon turmeric
  • One teaspoon cumin
  • One teaspoon chilli powder
  • 1cm fresh ginger
  • Black pepper

Method

  • Wash and then soak the mung beans for at least four hours (the longer you soak them, the quicker they’ll cook). Then put them in a pan, cover with the water and add the turmeric, cinnamon, cumin and chilli powder.
  • Bring to a boil and then simmer for 30 minutes, add the tomato paste, grated carrot and courgette, the thinly-sliced celery and the minced ginger, stir well and simmer for another ten minutes or so. The mung beans should just be beginning to go soft. Pour into bowls and serve with a generous grind of black pepper.


Say Aloo to Broccoli

28 February 2019

After touring through North America and Mexico, we’re finally back at KCC’s winter HQ in Almaty, Kazakhstan. We’ve been craving for something spicy and Asian and, with broccoli in season, decided on this take on the Indian classic aloo gobi.

20190223_215808.jpg
Aloo broccoli, rice and dal

You’ll probably be familiar with aloo gobi, which combines potato and cauliflower in a spicy sauce, if you’re a fan of food from the Indian sub-continent. Having eaten the cauliflower version numerous times, we started to wonder why we’d never come across the dish made with broccoli instead.

It turns out that broccoli is a fairly recent arrival to the tables of India – it was first brought to the country in the early 1990s by a farmer called Jitendra Ladkat, according to this article. So, therefore, there’s no great surprise that it does not feature as a mainstay of Indian cooking.

We served up our aloo broccoli with a split pea dal, brown rice and some flat bread and can thoroughly recommend it as an alternative to the tried and tested aloo gobi.

Ingredients (for 3-4 servings)

  • 400 g small potatoes
  • 400 g broccoli florets
  • One small red onion
  • 200 g tomatoes
  • 50 ml cooking oil
  • Spices: one teaspoon each of cumin seeds, coriander, chilli powder, turmeric, six cloves, one star anise.

Method

  • Cut the potatoes into quarters and put into a pan of boiling water and simmer over a low heat for five minutes, then add the broccoli, cover the pan and cook for another five minutes.
  • Heat the oil in a heavy-based pan and add the cumin seeds, cloves, star anise and cinnamon stick. After five minutes add the chopped onion and cook over a medium heat. Add the coriander, chilli powder and turmeric and mix well.
  • Add the tomatoes and cook for a few minutes over a low heat and then add the cooked broccoli and potatoes. Mix well and cook for ten minutes, stirring occasionally.
  • Serve with rice, dal and flat bread. The dish tastes even better if left overnight and reheated as this allows time for the flavours to blend.

Couscous on the Loose

6 December 2018

This week we’ll be making our take on couscous, that staple of North African cooking. Our version uses fine bulgur wheat in place of the more usual durum wheat semolina base as bulgur wheat is easier to find on the supermarket shelves where we are based.

20181002_215336
KCC’s couscous with chickpea chutney and roasted vegetables

In our opinion, bulgur works just as well as semolina as a base to soak up the juices from the roasted vegetables and our chickpea chutney. Purists may disagree, but our philosophy is more about adapting recipes by using the ingredients you have at hand.

Ingredients (serves 2)

Roasted vegetables:

  • 300 g pumpkin
  • 2 medium carrots
  • 2 medium courgettes
  • 25 ml olive oil
  • 1 teaspoon cumin seeds
  • 1 cinnamon stick

Chickpea chutney:

  • 25 ml olive oil
  • 1 teaspoon mustard seeds
  • 1 small red onion
  • 2 small tomatoes
  • 50 g currants
  • 250 g chickpeas
  • 1 teaspoon red chilli flakes
  • 1 teaspoon black pepper

Couscous:

  • 100 g fine bulgur wheat
  • 200 ml vegetable stock

Method

Pre-heat the oven to 200c, cut the vegetables into large chunks and put into a baking dish, drizzle with olive oil and add the cumin seeds and cinnamon stick and stir to coat the vegetable chunks. Roast for 30-40 minutes until the vegetables are cooked.

While the vegetables are roasting, prepare the chickpea chutney. Heat the olive oil in a frying pan and add the mustard seeds. When they start to pop, add the finely chopped onion and cook over a low heat for five minutes. Add the spices and the chopped tomato and cook for five more minutes. Then add the currants and chickpeas and cook for fifteen minutes or so.

Bring the vegetable stock to the boil and then cover the bulgur wheat with it and leave it to soak up the liquid for 30 minutes or so, drain off the excess liquid (if there’s any) and than add a dash of olive oil and fluff up with a fork.

Put a layer of couscous on a warmed plate, arrange the roasted vegetables in a circular, wheel-spoke pattern and put a generous dollop of chickpea chutney in the centre and serve immediately.

Pumpkin Paella aka Halloween Hayashi Rice

25 October 2018

Welcome back to Knidos Cookery Club, this time round we’re drawing on our summer trip to Spain to bring you a paella (Warning: any Valencians reading this, please stop now!) that’s packed with pumpkin and other seasonal vegetables such as celery and leeks.

20181006_083617
KCC’s pumpkin paella

With Halloween just around the corner, you might be looking for a dish that uses up some of the leftovers from carving out your Jack O’ Lantern – this rice combo should help shift some of the backlog.

Paella originates from Valencia in Spain, where it is taken very seriously. The name derives from the Old French word paelle for pan, which in turn is from the Latin word patella, which also means pan. The contemporary name refers to the shallow metal dish in which paella is prepared.

20180826_152146
Green veg paella, Dénia, Spain

In essence, paella is a combination of whatever is to hand rather than a fixed, unchanging blend of ingredients. While visiting Dénia, which is part of the Community of Valencia, we had a great green paella made with artichokes one other green vegetables.

Ingredients (serves 2)

  • 25ml olive oil
  • 150g short grain rice
  • 300g leek
  • 50g celery
  • 300g pumpkin
  • 100g tomatoes
  • 75g chickpeas
  • 600ml vegetable stock
  • One teaspoon each of cumin/chilli powder/turmeric

Method

  • heat oil in a frying pan (or paella pan if you have one)
  • add chopped leek and celery and sauté until soft
  • add spices and stir
  • add pumpkin cubes and cook for ten minutes, stirring occasionally
  • add vegetable stock
  • bring to a boil, then simmer to make a broth and allow it to reduce by half
  • add rice and simmer until the liquid is absorbed and the rice is cooked (around 20-30 minutes)

Chickpea and Courgette au Gratin – Autumn Comfort Food

27 September 2018

This week we’ll be cooking something for the chillier autumnal evenings, a tasty bake that combines chickpeas, tomatoes and courgettes with a breadcrumb topping.

20180613_221627.jpg
Chickpea and Courgette au Gratin

The autumn months are always a busy time in the KCC kitchen with not much time for shopping so we dug deep into the kitchen cupboard and found some dried chickpeas and then located a bag of breadcrumbs in the freezer. After some googling, we came up with a recipe for this gratin.

If you’re using dried chickpeas, then we suggest soaking overnight in cold water and then simmering for an hour or so in fresh water until they are beginning to soften. You can even try this method that was featured in the Guardian recently, which soaks the chickpeas for 48 hours to make them ultra soft.

Ingredients (serves 3-4)

  • 75 ml olive oil
  • 1 teaspoon cumin
  • One medium-sized onion
  • 250 g tomatoes
  • 250 g chickpeas (cooked)
  • 100 ml chickpea cooking liquid (or vegetable stock)
  • 200 g courgettes

For the topping:

  • 125 g breadcrumbs
  • 15 g parsley
  • 2 teaspoons red chilli flakes
  • Black pepper

Method

  1. Heat 25ml of olive oil in a frying pan and add the cumin seeds and finely chopped onion. Fry for 10 minutes or so over a medium heat until the onions are translucent. Add the peeled, chopped tomatoes and cook for another 10 minutes and then add the chickpeas and stock and simmer over a low heat for 10 more minutes.
  2. While this is cooking, heat another 25ml of olive oil in a frying pan and fry the courgette (cut it into 0.5 cm rounds) over a medium heat, turn the courgette rounds over after five minutes so both sides are charred.
  3. Pour the chickpea and tomato mix into a greased oven dish, cover this with fried courgettes. Mix the breadcrumbs, the remaining oil and the herbs and spices together well and then cover the bake with this mixture.
  4. Bake in a pre-heated oven at 180 c for 30 minutes or so, until the mix is bubbling and the topping has gone a nice golden brown. Serve with a green salad and boiled or fried potatoes


Mezemania: Funky Lentil Pâté

26 July 2018

In our ongoing series on mezeler, or starters, we’ve come up with a funky little lentil spread to add to the collection.

20180712_135704
Funky Lentil Pâté

In the past on Knidos Cookery Club we’ve featured the following mezes: two types of fava (Turkish and Greek),  these little numbers (smoky aubergine dip, Psimeni Raki and feta dip and tsatsiki) inspired by the Greek island of Amorgos, fiery red pepper-fuelled muhammara and acili ezme and a creamy almond and courgette dip as part of our esteemed meze collection.

20170819_212721
Amorgoan Delight: smoky aubergine dip, Psimeni Raki and feta dip and tsatsiki

You can serve this simple to prepare red Lentil Pâté alongside these other dishes for a great spread of mezeler for a light feast that’s perfect for sharing with friends  on a balmy summer’s night.

Ingredients (makes around 200g)

125 g red lentils

One bayleaf

300 ml cold water

Two tablespoons fine bulgur wheat

4 or 5 spring onions

10 g fresh parsley

25 ml olive oil

One teaspoon mustard seeds

One teaspoon cumin seeds

Two teaspoons paprika

One teaspoon ground coriander seeds

One teaspoon black pepper

Half a teaspoon turmeric

Method

Clean the lentils in cold water and then put them in a pan with the bayleaf. Pour 300 ml of water over the lentils and bring to a boil. Reduce the heat and simmer until the lentils are beginning to go mushy and most of the water has been absorbed.

Remove the bayleaf and add the fine bulgur wheat to the lentils and mix well. Leave covered for 30 minutes. heat the oil in a heavy-based pan and add the mustard and cumin seeds. Fry for a few minutes and then add the paprika, coriander, black pepper and turmeric, cook for a minute stirring constantly and then add the finely chopped spring onion and parsley and cook for five more minutes over a medium heat.

Stir this into the lentil and bulgur mix and leave to stand for a few hours in the fridge. Garnish with a sprig of fresh mint and serve with crusty bread.

Hasty Tasty Stuffed Peppers

12 July 2018

This time round on Knidos Cookery Club we’re taking inspiration again from our recent Balkan odyssey. While on our mission to Albania, we tasted the local take on stuffed peppers and on returning to KCC H.Q. we decided to recreate this delicious dish with a few time saving tricks of our own devising.

20180710_214345 copy2
Hasty tasty stuffed peppers with baked cauliflower and tomato

Rice is the usual go-to base for stuffing peppers, but it can be a bit time-consuming to prepare properly. With the World Cup reaching its conclusion, we didn’t fancy spending too much time slaving away in the kitchen so we’ve used some coarse bulgur wheat, which just needs soaking in hot water for a short while before it’s ready to use.

We cooked the peppers alongside some cauliflower, broken up into large  florets, and some quartered tomatoes to make a ready made meal for two with only a green salad needed to complete the show, allowing plenty of time to sit down and enjoy what’s left of the football!

Ingredients (for two people)

Two medium-sized green peppers

Two medium-sized tomatoes

Half a cauliflower

50 g cooked green lentils

50 g coarse bulgur wheat

200 ml hot water

25 ml olive oil

One teaspoon cumin seeds

One teaspoon dried thyme

25 g  raisins or currants

Black pepper (a generous twist)

Method

Cook the green lentils in twice the amount of water (put the lentils in a cup and then measure out twice as much water) until they start to go mushy. Put the bulgur wheat in a bowl and add the lentils and 200 ml hot water, stir and leave until the water is absorbed (20-30 minutes). Add the cumin, thyme, raisins and black pepper to the bulgur wheat and stir in well.

Pre-heat the oven to 180 c and prepare the peppers by slicing the top off and scooping out the seeds. Fill the hollowed-out peppers with the bulgur lentil mix, place the top back on and place in an oven dish. Arrange the cauliflower florets and quartered tomatoes around the pepper.

Drizzle the olive oil over the vegetables, add 50 ml water and bake in the oven for      40-50 minutes until the pepper skins start to burn and the florets are turning golden brown. Serve with a green salad.